Showing posts with label breakfast. Show all posts

6.06.2009

Buttermilk Biscuits - homemade style!


I have tried to make biscuits once before, and they did not turn out! Because I failed the first time, I felt like I just didn't have the right touch and therefore wasn't meant to make biscuits. After watching a coworker throw together some biscuit batter in a matter of minutes and then throw it in the oven... only to watch her fail, made me feel like I needed to step up and find a recipe and bring it in and show my new employer that I will make their biscuits because I know how to! Everything with me is a competition, in case you didn't know. I mean I was ashamed of this woman's biscuits and I hope she never tries to feed them to anyone again!

So I went home and researched and found a recipe to try. I have a cookbook from America's Test Kitchen and I figured - how could a test kitchen get it wrong? Surely they have the perfect biscuit recipe... and sure enough, they do. I also learned a few tricks and added in a few things of my own so I could call them "my own" even though I totally stole the basic recipe.

So a few side notes to start you off..

If you don't have buttermilk on hand, shame on you.. but I used to not have that as a staple in my fridge, either... So to make your own soured milk, mix 1 1/4c milk with 1 T lemon juice or vinegar and let stand for 10 minutes.

And when cutting out biscuit rounds, stamp the round into the dough, DO NOT TWIST. If you twist the biscuit cutter, it pinches the dough and your biscuit will not rise properly. So just press the cutter down firmly and lift up.

When laying your biscuits out on a sheet pan, I tend to line them up so they're all touching, not leaving a space between them. I find that this helps the biscuits rise higher instead of falling out to the sides. I also take some melted butter or cream and brush the tops of the biscuits before baking... Just for some flavor and color.

Buttermilk Biscuits
adapted from America's Test Kitchens
yields 8 - 10

  • 3 c unbleached all purpose flour, plus extra for the work surface and cutter
  • 1 T sugar
  • 1 T baking powder
  • 1/2 t baking soda
  • 1 t salt
  • 8 T (1 stick) unsalted butter, cut into 1/2" pieces and chilled
  • 4 T vegetable shortening, cut into 1/2" pieces and chilled
  • 1 1/4 c buttermilk
  1. Adjust an oven rack to the middle position and heat the oven to 450 degrees. Line a baking sheet with parchment paper. Pulse the flour, sugar, salt, soda, baking powder, butter and shortening in a food processor until the mixture resembles coarse meal. (If you do not have a food processor, you can combine these in a bowl and use a pastry blender to blend them together... or go really old school and use 2 knives.. anything that blends it together but you don't want to warm it up so that the butter gets softened) Transfer to a large bowl and stir in the buttermilk until combined (I used a fork).
  2. On a lightly floured surface, knead the dough until smooth. 8 to 10 kneads. (Dough will be very sticky, but will become easier to work with as you knead it). Pat the dough into a 9" circle, about 3/4" thick. Using a 3" biscuit cutter dipped in flour, cut out rounds of dough and arrange on the prepared baking sheet. (I don't own a biscuit cutter, so i just found something round in my kitchen and used it to cut the dough. I honestly used the cap to my baking spray can! But it made like 2" biscuits because it was small. You could use an empty soup can or something of that nature). Gather remaining dough and pat into a 3/4" thick circle and cut out remaining biscuits. I still had enough dough after this to pat it out for a 3rd time.. but usually that last biscuit won't be as soft as the first ones since it's been overworked.. but hey - why throw it out? You should have roughly 8-10 biscuits.. or if you're like me and used the cap to a spray can, I had more like 14 biscuits!
  3. Bake until the biscuits begin to rise, about 5 minutes, then rotate the pan and reduce oven temperature to 400 degrees. Bake until golden brown, 12-15 minutes. Transfer to a wire rack and cool.
Or serve warm with some fresh strawberry jam or butter and local honey! Oh so good.
I threw the rest of mine in the freezer to pull out for later enjoyment.

Enjoy!
Posted by Lauren
4.16.2009

Strawberry Ricotta Muffins


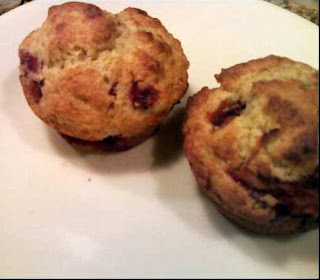
I made these guys for breakfast one morning. Though slightly time consuming due to roasting the strawberries the aroma that will fill your house is well worth the wait! The reason the strawberries are roasted is so that they become slightly "dehydrated."

See, strawberries are a very juicy ingredient. Any baker knows that trying to actually bake with them can be tricky as the liquid that eventually releases itself into any batter ends up changing the dynamics of the batter because of it. So, the work-around is to roast the strawberries. By roasting the strawberries they release their juices in the roasting pan, not your batter, and as a result their sweetness is concentrated and their shape will hold in whatever you are making. And oh man, the smell. The smell! So amazing. It brought me back to being at home when my mom would make her homemade preserves. It's an intensly sweet aroma that's just the prequel to what's to come.

These muffins are extremely light and fluffy and most definitely moist. They hold up for days as well!


Ingredients:
  • 2 cups medium strawberries
  • 3/4 cup ricotta
  • 2 large eggs
  • 1/2 tsp. vanilla extract
  • 10 Tbsp. butter melted and cooled, divided
  • 2/3 cup sugar
  • 1 tsp. lime zest
  • 2 cups flour
  • 2 tsp.baking powder
  • 1/2 tsp. salt
  • 1/4 tsp. baking soda
Directions:
  1. Preheat oven to 350 degrees. Gently wash, hull, and cut strawberries into quarters. Place berries on a cooling rack over a sheet pan. Bake until strawberries are partially dried, about 45 minutes. Let cool.
  2. Increase oven to 400 degrees. Brush a 12-mold muffin tin with 2 Tbsp. melted butter. Set aside.
  3. In a bowl, whisk together ricotta, eggs, and vanilla. Stir in remaining butter.
  4. In a large bowl, use your fingertips to rub together sugar and lime zest until sugar is moist. Mix in flour, baking powder, salt, and baking soda. Use a spatula to gently but quickly fold ricotta mixture into dry ingredients. Don’t overwork it. The batter will be thick and heavy, much thicker than most batters so don't be alarmed! Stir in strawberries and spoon batter evenly into muffin tins. Bake until tops of muffins are golden and springy to the touch, about 20-25 minutes.

Makes 12 muffins


Buon Appetito!
- Lindsay

3.22.2009

Easy Buttermilk Pancakes... with blueberries and meyer lemon

So no photo guys... I mean, you know what pancakes look like, right? Right. But I figured I'd give you a recipe that is so easy and simple, you don't need a box to make them. You really can't go wrong, you can add whatever mix-ins you want.. its a perfect base for any pancake you wish to make. OH yeah... and its yet another recipe I'm submitting with buttermilk as the star.

Easy Buttermilk Pancakes
(recipe courtesy of Martha White)
or... Meyer Lemon Blueberry Buttermilk Pancakes
(recipe courtesy of lauren anderson)

Makes roughly 12 pancakes, give or take.

Ingredients:
  • 2 Large Eggs
  • 2c Buttermilk
  • 1/4c vegetable oil
  • 2c self-rising flour
  • 2T sugar
  • 1/2t baking soda
  • zest of 1 meyer lemon (lauren's addition)
  • 1 pint fresh blueberries (lauren's addition)
Directions:
  1. Heat griddle or non-stick skillet to medium-high heat (375 degrees). Spray lightly with nonstick spray
  2. Beat eggs in large bowl with fork or whisk. Add buttermilk and oil and stir to combine. In separate bowl, mix dry ingredients. Add to buttermilk mixture; stir just until large lumps disappear. (its ok if there are still small lumps in the batter) Stir in lemon zest. Let rest for at least 15 minutes.
  3. Pour about 1/4c batter onto hot skillet. Sprinkle a few blueberries on top of pancake at this point. Cook 1-2 minutes until bubbles form around edges and bottom has set enough to flip. Turn, cook another 1-2 minutes or until golden. (you may need to adjust heat and time so not to burn the pancakes.) And remember.. usually the first one is a throwaway anyway.

So some other variations you could do... Well thats for you to discover! I'm sure Lindsay will just put chocolate chips in the design of a smiley face on hers and wish she was 6 years old again.

submitted by LAUREN!

1.06.2009

Healthy - Yes! Healthy.... Banana Blueberry Muffins

So despite my first entry, followed by an email... I sill feel like the one who is dominating this blog. I can't help but wonder if thats how it will continue. Anyone up for the challenge?

Anyway, I think most of the ladies of the family subscribe to Everyday Food magazine, and if so you probably saw this recipe in the most recent January/February 2009 issue for healthy banana blueberry muffins. Now if you're like me, you love an excuse to use those overripe bananas you bought in the hopes of eating a healthy breakfast every morning... but alas, you didn't and they sat there to ripen to the point of inedible ... that is unless you like to mash em up and throw them in a quick bread! So here's the recipe, which you can also find in your magazine... but with a few slight changes to appeal to my own taste buds.

Banana-Blueberry Muffins
adapted from a reader recipe in Everyday Food magazine

Makes 12 - Prep Time: 30 minutes - Total Time: 55 minutes + cooling

Ingredients:
1c whole wheat flour - spooned and leveled!!!
3/4c all-purpose flour
1/4c wheat germ*
1t baking soda
1/2t salt
1/2t cinnamon
1/2c (1 stick) unsalted butter, room temperature
1/3c granulated sugar
1/3c packed light-brown sugar
2 large eggs
2 ripe bananas (about 1lb)
1/3c lowfat buttermilk
1t pure vanilla extract
1c frozen blueberries

Directions:

1. Preheat oven to 375 degrees. Line a 12-cup muffin pan with paper liners. In a bowl, whisk together flours, wheat germ, baking soda, salt, and cinnamon.

2. In a large bowl, beat butter and sugars with a mixer until light and fluffy, about 2 - 4 minutes. Add eggs, one at a time, beating well after each addition. In another bowl, mash bananas with a fork (you should have about 3/4 cup); stir in buttermilk and vanilla.

3. With mixer on low, alternately add flour mixture and banana mixture to butter mixture, beginning and ending with flour mixture; mix just until combined. Fold in frozen blueberries. (You can throw in a little flour with the blueberries to help keep them from sinking to the bottom of the muffin batter. Also, after making these, I felt like you could add a little more blueberries than it calls for)

4. Divide batter among muffin cups.** Bake until a toothpick inserted in the center of the muffin comes out clean, 25-28 minutes, rotating pan halfway through. Let cool in pan 10 minutes; transfer muffins to a rack and cool 10 minutes more.

* wheat germ was hard to locate in the grocery store, but I finally found it in the cereal isle. It comes in a jar, similar to an instant coffee jar. If you can't find it, I don't think its an ingredient that is necessary - but it adds a lot of healthy components to the muffins. Make sure to refrigerate it after opening!

** Muffins, unlike cupcakes, rise and don't fall off the sides of the pan. Don't be afraid to fill the muffin cups to the top! I find it easiest to use one of those spring loaded ice cream scoops to scoop batter into the muffin pan. So much easier and no mess! So yes, this makes 12 - so please don't try and spread it out to make 15.


Alright, so there you have it. Another recipe submitted by lauren. Oh! I guess I should claim the ones I submit! just thought about that. I'll try and take pictures of my food and go back and add them to the posts to help show what these things look like when done. mmmm time for me to go eat a muffin!