7.20.2009

Ponzu Sesame Seared Tuna with Zucchini & Sweet Onion Sautee


So I'll try my best to recreate this dish for the purpose of this post - but it probably won't turn out EXACTLY like mine did, since I threw stuff together on a whim. I knew we had this amazing sashimi grade Tuna to use up and no money to spend on more groceries... so it required to dig around the pantry/refrigerator to come up with a marinade for the Tuna and a side dish to stand up to the meal.
So I created a marinade from some toasted sesame oil, ponzu sauce, soy sauce, honey, brown sugar, garlic, and vegetable oil. I think some ginger would have really tied it together well, but didn't feel like making a quick trip to the store for a tiny knob of fresh ginger. The zucchini & sweet onion sautee came together out of a late night scramble for some food ... and it turned out to be so yummy I wanted to make it again for dinner the next night! To make the meal complete, I cooked up some brown basamati rice (any rice would work, but thats what we had in the pantry) and served it on the side with the zucchini.

Ponzu Sesame Seared Tuna
serves 2

Ingredients:
  • 2 6-8 oz portions of sashimi grade tuna
  • 2T toasted sesame oil
  • 1T ponzu sauce
  • 2t soy sauce
  • 1T honey
  • 2T brown sugar
  • 2 cloves garlic, minced
  • 1/4c safflower oil, or vegetable oil
  • fresh cracked pepper
Directions:
  1. Whisk together sesame oil, ponzu, and soy sauce until combined. Add in honey, brown sugar, and minced garlic. Slowly whisk in safflower oil until all is combined. The important step now is to taste. If its too salty (as the ponzu/soy sauces tend to be quite salty), add more brown sugar. If its too sweet, add more ponzu. If its too strong, add more oil... Again, I did this all on a whim and added more of this and that until the flavor was what I wanted.
  2. Pour marinade in a ziploc bag and add tuna steaks to the bag. Seal and set on the counter for 30 minutes. I say leavethis out at room temperature because the Tuna is seared rare, so to keep the center from being ice cold, I left mine out to at least try and keep it slightly warm.
  3. Heat a skillet over medium heat. Add a little safflower oil to the skillet and once oil is hot, add tuna steaks. It will spit and smoke.. and the sugars from the marinade may burn up in the skillet.. so be careful. Cook tuna about 2 minutes per side depending on how rare you like your tuna. I like mine pretty rare, so about 2 minutes per side does the trick. Remove from heat and let rest. While the tuna is marinating, you can cook your rice and make the zucchini side dish.
Zucchini & Sweet Onion Sautee
serves 2

Ingredients:
  • 1 large zucchini, sliced 1/2" slices then sliced in half (so they're like half moons)
  • 1/2 sweet vidalia onion, sliced
  • 2 cloves garlic, minced
  • 1T soy sauce
  • vegetable oil
  • 1t toasted sesame oil
  • 2t honey
  • salt & pepper to taste
Directions

  1. Heat vegetable oil with the toasted sesame oil over medium heat. Add onion and cook until starting to caramelize, about 10 minutes. Add zucchini and season with salt and pepper. Add soy sauce and continue to cook. Add honey. Once the zucchini gets close to being fully cooked, add in the garlic. (I like to add the garlic later so that it doesn't overcook or burn) Continue to cook about 5 minutes, so garlic has softened and zucchini is fully cooked.
  2. Important step -- Taste! If its too salty, add a little more honey. Its important not to put too much soy sauce in the dish so not to overpower it. Remove from heat and cover to keep warm until Tuna is ready.

So there you have it - hopefully it comes close to what I created that night. It's very tasty and I intend to make this marinade again! Hope it comes out for you as well. Good luck and Enjoy!

Posted by lauren

Heirloom Tomato BLT


A recent trip to the Farmer's Market led to purchases to create the ultimate farmer's market/local BLT sandwich. We started with some fresh homemade Amish bread, a lovely head of organic romaine lettuce from Delvin Farms, and an assortment of locally grown heirloom tomatoes. We also managed to come across some fantastic applewood smoked bacon from Niman Ranch (where their pigs run free, never fed hormones or antibiotics, no nitrates are added, and humanely raised on sustainable farms).

So I know there is no wrong way to create a lovely BLT - and really, the recipe is in the name... Bacon, Lettuce, and Tomato. So I suppose my "recipe" will just more or less be a list of ingredients.

Farmer's BLT -

4 Thick slices of fresh bread, toasted
Romaine lettuce
6 strips of applewood smoked bacon, browned in a skillet, turning frequently
Heirloom Tomatoes, preferrably 2 or 3 different types, 2 slices out of each one.
Mayo, preferrably Dukes


The layering, to me, is important to be done in a certain order. Of course, this is only because I'm obsessive compulsive and prefer to have the tomatoes in the center. You spread mayo, generously, on BOTH pieces of toast. Start with layering the lettuce, as much or little as you would like. Season your slices of tomatoes with some sea salt and fresh cracked pepper. Layer 3 slices of tomatoes on top of the lettuce. Next take your bacon and layer it on top of the tomatoes. I like to have these lay diagonally on the toast. Then top with final piece of toast. Slice sandwich in half diagonally (opposite direction of the bacon) and voila! The perfect BLT. These will probably become a typical weekend meal throughout the summer while heirloom tomatoes are in season.


So go out - enjoy your local farmer's market - and create the ultimate BLT with some fantastic ingredients that didn't travel across the country to reach your kitchen.

Posted by Lauren

6.22.2009

Meyer Lemon Limoncello


I can't remember the exact time and place I first has Limoncello, but I'm pretty sure it was within the first month of the year that I spent living in Florence. I remember one evening I had gone out with a group of friends to celebrate someone's birthday. It was a nice restaurant, though nothing over the top. What stood in my mind, however, was how after the dinner the restaurant sent down complimentary glasses of limoncello and grappa. (This by the way, is a custom I think should be adopted in America!) It's an extrememly strong and fragant drink that left a lasting impression while also the lesson that one does not "shoot" limoncello (though it does come in shot glass). Limoncello is a digestivo that is to be sipped after dinner as to aid in digestion.


If any of you reading this are unfamiliar with the drink, limoncello is an Italian lemon liqueur mainly produced in Southern Italy, predominately in the region around the Gulf of Naples, the Sorrentine Peninsula and the coast of Amalfi, though served throughout the country. It is bright yellow in color, sweet and lemony, but not sour since it contains no lemon juice. As I mentioned above, it is traditionally served chilled as an after dinner digestivo.

But what really makes this drink great is that unlike many other liqueurs, limoncello is easy and inexpensive to produce, requiring only sugar, water, lemon zest, alcohol, and time to mature.

Ingredients:

  • 20 lemons - clean, unwaxed with nice plump skins. Try to get organic fresh lemons when you can so it doesn't have an added wax layer to the lemons. Remember you'll be drinking this! Luckily, I'm in California where it's common to find lemon trees. My coworker was kind enough to donate her Meyer Lemons. If you can find someone with a tree, this is your best (and most affordable) option.
  • 2 (750-ml) bottles Everclear or pure grain alcohol. Everclear is good for two reasons - it's pure alcohol meaning it's got a high proof and it has no other underlying flavor or added sugar. If you can't find Everclear, try a clear alcohol with as high of a proof as you can find. 80-proof isn't quite enough as the solution will be come diluted with simple syrup.
  • 2 to 3 cups of water
  • 2 to 4 cups sugar (a 1:1 ratio of sugar to water makes a classic simple syrup, but use more sugar if you want yours a little thicker or sweeter)

For this recipe you also need a large (2-3 liter) glass jar with a sealed lid. The jar should be washed and rinsed very well or sterilized. You don't want anything in your limoncello but what you put there. I use an old-fashioned sun tea jar. Because it isn't quite air tight I covered it with plastic wrap.

You will also need the bottles you want to put the final brew in. I bought some French lemonade to drink and saved the bottles for this purpose.

Step 1: lemon in alcohol

1. Wash and dry the lemons. Only use the ones without blemished peels or pare off any spots and the stems, ends.
2. Remove the peel from the lemons with a sharp peeling knife, carefully avoiding the bitter white pith. If you choose to peel your lemons, please note that if any white pith remains on the back of a strip of peel, scrape it off. If you get any of the white part in the batch, the limoncello will be bitter and you don't want that! This is the time consuming part, but avoid the temptation to rush.
3. Put the peels in a glass jar and add the Everclear, leaving at least two inches below the top rim. Seal tightly.
4. Leave the lemons to steep in the jar in a cool, dark place until the peels lose their color, at least 4 weeks. I left mine for roughly 3-4 months. Every couple of weeks I swirl the peels around in the jar to mix up the oils in the alcohol.

Step 2: make the simple syrup and add it.


1. Put the water and sugar in a saucepan, stir and slowly heat until it turns clear and all the sugar is dissolved completely. Let the syrup cool.
2. Put the cooled syrup in the jar with the lemons (you might have to divide the batch into two jars at this point, depending on the size of your jar).
3. Put the jars back in the closet for at least two weeks. Longer is fine too.

Step 3: strain and bottle


1. Strain out the lemon peels through a colander, coffee filter or cheesecloth and pour the limoncello into another container. Press down to remove all the vodka and oils that you can from the peels before tossing them in the trash. As you will notices, just like the picture above, the rinds will have become a very pale yellow.
2. Stir the liquid with a clean plastic or wooden spoon.
3. Put the liqueur in clean bottles and seal tightly.

For best flavor and drinking it straight, store the limoncello in your freezer. It shouldn't freeze (unless you used 80-proof vodka) because of how much alcohol is in it. It'll become thick and syrupy. A perfect end to a hot summer day.


Delicious Uses for Limoncello:

* straight up frozen in limoncello shot glasses
* spiking a tall glass of cold lemonade or iced tea
* splashed in glasses of champagne
* over ice cream or angel food cake
* splashed on a fresh fruit mixture
* in sparkling water, tonic or soda.


Cin cin!
– Lindsay

6.15.2009

Grilled Watermelon Salad


My new favorite thing to eat!! I had no idea this would be so amazing... but something about the flavor the watermelon takes on once it hits that grill.... It satisfies every taste bud - yes that's cheesy to say, but honestly - you have the sweetness from the watermelon, the tangy-ness from the goat cheese, the bitterness/spicy-ness from the arugula, and the sweet and tangy balsamic to top it off... Oooh its so good.
You don't need to own a grill to make this, either - but you do need a grill pan. I have one of those cast iron grill pans from Lodge that does the trick perfectly - although the first time was done over a regular grill, and it might add a hint of smokiness to the melon that you can't get from a grill pan.
It's quickly become my new favorite summertime meal - and its really simple and really affordable (especially since entire watermelons sell for $4 at the store this time of year!)

Grilled Watermelon Salad
serves 4

  • 4 slices of seedless watermelon, about 1/2" thick or so, rind removed
  • 4oz log of goat cheese, crumbled
  • baby arugula, enough for 4 people - not sure how much that is
  • balsamic vinegar
  • salt & pepper
  1. Heat your grill pan over medium - medium/high heat. Or if you're using an outdoor grill, I would suppose it would be because you're grilling something else, so just leave some room on the side for some watermelon.
  2. Brush some vegetable or safflower oil on both sides of the watermelon and place on your preheated grill, about 1-2 minutes per side. You want the watermelon to start getting grill marks on them and picking up a slight caramel color. Flip and cook another 1-2 minutes. If you're using an outdoor meal, you'll want to grill this over indirect heat.. just off to the side of whatever you're cooking.
  3. Remove from grill, place on plates, and crumble goat cheese over the top of the warm watermelon. Dress the arugula with some balsamic vinegar, salt, & pepper and set on top of the goat cheese and serve!
Really, I know it sounds weird - but its sooooo good. AND it's relatively healthy! Even better.

Posted by Lauren

6.10.2009

Orecchiette with Broccoli, Roasted Garlic, Mushrooms & Caramelized Onions


and toasted pine nuts, fresh basil, in a lemon butter sauce.......

Figured the name of the pasta was too long to be a title, because all ingredients are important in this pasta, not just the 4 main ones.

Well I was trying to come up with a pasta to make with Orecchiette and Broccoli - something light and vegetarian.. I was having dreams of the orecchiette and broccoli rabe dish I'd had from Savarino's Cucina (a little italian place in Nashville) and wanted to take the concept but make it something different. So after a little internet research, I came across a few ideas and ended up with this dish. It's a tad time consuming due to the nature of the ingredients, but it's super easy and very tasty and I've already made it twice this week!

Orecchiette with Broccoli, Mushrooms, & Light Lemon Butter Sauce
serves 4

  • 1lb orecchiette pasta
  • 2T veg. oil - or olive oil
  • 1-2c broccoli, cut into bite size florets (depends on how much broccoli you like)
  • 1/2lb cremini mushrooms
  • 1 small vidalia onion (or sweet onion if you're not a southerner)
  • 1 head of garlic, roasted*
  • 1/4c pine nuts
  • 1 lemon
  • 2-3T butter
  • a small chunk of parmigiano cheese
  • fresh basil
  • salt & pepper
  1. In a dry skillet over medium heat, toast pine nuts, about 5 minutes. WATCH THESE CAREFULLY. If you walk away and forget - you've ruined your pine nuts. You want them to turn a nice golden brown.
  2. Chop up your onion into medium size pieces. Using the same skillet you toasted the pine nuts in, let the pan cool down a little and then add about 1T of oil to the skillet and throw in the onions. Season with some salt & pepper (I actually add about a 1/2t of sugar to help with the caramelization). Cook the onions until they start to get nice and soft and a nice golden color. While these are cooking, wash and slice your mushrooms.. Once the onions have started to turn a golden color, add a little more oil and add in the mushrooms. Season again with salt & pepper. Continue to cook for about 10 minutes, so mushrooms have caramelized with the onions.
  3. While you're cooking the onions & mushrooms, heat up your pot of water for the pasta and in a smaller saucepan, steam the broccoli florets until tender. Once the water for the pasta has come to a boil, salt the water generously and add in the pasta. Cook until al dente (about 13 minutes). Drain pasta and return the pasta back into the hot pot. Zest the lemon over the pot, throw in the butter, and squeeze half the lemon over the pot - you may use more if your lemon is small, but I found I didn't want the lemon to over power the dish, so I only used half a lemon.. Stir together until butter has melted. If you want, you can save 1/4c pasta water and add it in, it will help make the sauce a little "thicker". At this point, grate some fresh parmigiano cheese over the pasta - about 2 tablespoons should suffice. Stir to melt the cheese. Chop up the roasted garlic and add it to the pasta - also add in your broccoli, caramelized onions/mushrooms, and toasted pine nuts. Chop up some fresh basil and add it in as well.
*to make your own roasted garlic, you can take a whole head of garlic, slice off the top of it to expose all the cloves within.. drizzle olive oil over it, wrap it in aluminum foil and put it in a 400 degree oven for roughly 30 minutes - may take more time depending on the size. The cloves should be soft when you press it. Let cool until you can safely handle it and then ease the cloves out of their skin... you can usually squeeze them out.
OR can you cheat (like we did) and buy whole cloves of roasted garlic in the prepared foods section at whole foods.


So yeah - its just kind of a cook a bunch of things then throw it all together into a pot and there's your pasta. Its pretty tasty! Well worth the effort.
Oh and don't forget to enjoy it with a nice glass of refreshing wine. mmmmmmmmmmm pinot grigio.....

Enjoy!
Posted by Lauren


6.06.2009

Buttermilk Biscuits - homemade style!


I have tried to make biscuits once before, and they did not turn out! Because I failed the first time, I felt like I just didn't have the right touch and therefore wasn't meant to make biscuits. After watching a coworker throw together some biscuit batter in a matter of minutes and then throw it in the oven... only to watch her fail, made me feel like I needed to step up and find a recipe and bring it in and show my new employer that I will make their biscuits because I know how to! Everything with me is a competition, in case you didn't know. I mean I was ashamed of this woman's biscuits and I hope she never tries to feed them to anyone again!

So I went home and researched and found a recipe to try. I have a cookbook from America's Test Kitchen and I figured - how could a test kitchen get it wrong? Surely they have the perfect biscuit recipe... and sure enough, they do. I also learned a few tricks and added in a few things of my own so I could call them "my own" even though I totally stole the basic recipe.

So a few side notes to start you off..

If you don't have buttermilk on hand, shame on you.. but I used to not have that as a staple in my fridge, either... So to make your own soured milk, mix 1 1/4c milk with 1 T lemon juice or vinegar and let stand for 10 minutes.

And when cutting out biscuit rounds, stamp the round into the dough, DO NOT TWIST. If you twist the biscuit cutter, it pinches the dough and your biscuit will not rise properly. So just press the cutter down firmly and lift up.

When laying your biscuits out on a sheet pan, I tend to line them up so they're all touching, not leaving a space between them. I find that this helps the biscuits rise higher instead of falling out to the sides. I also take some melted butter or cream and brush the tops of the biscuits before baking... Just for some flavor and color.

Buttermilk Biscuits
adapted from America's Test Kitchens
yields 8 - 10

  • 3 c unbleached all purpose flour, plus extra for the work surface and cutter
  • 1 T sugar
  • 1 T baking powder
  • 1/2 t baking soda
  • 1 t salt
  • 8 T (1 stick) unsalted butter, cut into 1/2" pieces and chilled
  • 4 T vegetable shortening, cut into 1/2" pieces and chilled
  • 1 1/4 c buttermilk
  1. Adjust an oven rack to the middle position and heat the oven to 450 degrees. Line a baking sheet with parchment paper. Pulse the flour, sugar, salt, soda, baking powder, butter and shortening in a food processor until the mixture resembles coarse meal. (If you do not have a food processor, you can combine these in a bowl and use a pastry blender to blend them together... or go really old school and use 2 knives.. anything that blends it together but you don't want to warm it up so that the butter gets softened) Transfer to a large bowl and stir in the buttermilk until combined (I used a fork).
  2. On a lightly floured surface, knead the dough until smooth. 8 to 10 kneads. (Dough will be very sticky, but will become easier to work with as you knead it). Pat the dough into a 9" circle, about 3/4" thick. Using a 3" biscuit cutter dipped in flour, cut out rounds of dough and arrange on the prepared baking sheet. (I don't own a biscuit cutter, so i just found something round in my kitchen and used it to cut the dough. I honestly used the cap to my baking spray can! But it made like 2" biscuits because it was small. You could use an empty soup can or something of that nature). Gather remaining dough and pat into a 3/4" thick circle and cut out remaining biscuits. I still had enough dough after this to pat it out for a 3rd time.. but usually that last biscuit won't be as soft as the first ones since it's been overworked.. but hey - why throw it out? You should have roughly 8-10 biscuits.. or if you're like me and used the cap to a spray can, I had more like 14 biscuits!
  3. Bake until the biscuits begin to rise, about 5 minutes, then rotate the pan and reduce oven temperature to 400 degrees. Bake until golden brown, 12-15 minutes. Transfer to a wire rack and cool.
Or serve warm with some fresh strawberry jam or butter and local honey! Oh so good.
I threw the rest of mine in the freezer to pull out for later enjoyment.

Enjoy!
Posted by Lauren

Fish Tacos


Alright - I didn't have any possible way to make this picture pretty, because it was a messy meal! But oh soo good. Plus - its a really fun meal to make because you can have all kinds of options for toppings... and it makes a great meal for a large group because you just set up a little taco bar and let people make their own! (I recently had fish tacos at a friend's house, so it inspired me to come up with my own to make for Brandon and me to enjoy). Also - it helps having a new taco place in town, the Local Taco, to inspire me to want to eat them as well.

Fish Tacos

feeds 2-3 people

  • 3 Tilapia filets
  • 2 limes
  • 3 cloves garlic
  • olive oil
  • fresh cilantro
  • flour tortillas - I recommend Trader Joe's handmade tortillas
  • salsa - I recommend the pineapple salsa from trader joe's
  • sour cream
  • 1 can of black beans
  • 1 small red onion, or half of a larger one
  • a handful of cherry tomatoes (I used an heirloom tomato mix)
  • 1 serrano chili, or any chili depending on the heat you like
  • cumin
  • cayenne pepper
  • chili powder
  • salt & pepper

  1. First you'll want to mix the juice from one lime, a few tablespoons of olive oil, & 3 cloves of crushed/minced garlic in a small bowl... whisking until its well combined. Pour this mixture over the fish filets in a ziploc bag and let sit for at least 30 minutes in the fridge.
  2. In the mean time, heat up a can of black beans on the stovetop, drained, with finely minced red onion. Cook until thickened. Toward the end, throw in some fresh cilantro and lime juice for flavor.
  3. Chop the cherry tomatoes into smaller pieces along with the chopped chili pepper and some chopped red onion. Mix together in a bowl with some salt, pepper, fresh chopped cilantro and a little bit of olive oil. Set aside.
  4. Once the fish has marinated, heat a skillet over medium heat with a little bit of olive oil. Season the fish filets with salt, pepper, a little cumin, a little cayenne, and a little chili powder... you know what you can handle.. Cook the fish until it starts to fall apart - do not over cook!! It will become dry and not very tasty at all. Discard the marinade.
  5. Once the fish is done, let it rest on a cutting board for about 5 minutes... then using a fork, flake the fish apart into bite size pieces. Time to set up the taco bar! Make sure to steam the tortillas so they're nice and soft (in the microwave with paper towels for about 20 seconds should do the trick). Open up some salsa, sour cream, set out the cherry tomato mixture, some fresh chopped cilantro, a few lime wedges, and the black beans.
  6. Assemble your tacos and enjoy! You can either throw some black beans in with the taco or leave it on the side..either way its good. You could probably even cook up some rice to add in... or mash up some fresh avocadoes.. have some fresh mango or bell peppers... tons of options.

So I hope I managed to get everything in there.. I made this 2 weeks ago off the top of my head, so its hard to remember everything I did.. But they were really really really reallly good. I want some now!

Enjoy!
Posted by LAUREN!

Cucumber Cooooooler


So I came across this drink while flipping through a recent issue of SAVEUR magazine - which was all about Texas. (ah hem - hint to kyle) It's getting quite hot and sticky out here in Tennessee, so it was time for a nice, cool, refreshing beverage that would be a nice cocktail for warm nights on the porch.
I tend to go for the drinks heavy on the mint, but cucumbers - what fun! Especially now that prohibition drinks seem to be the hot item - I think its about time I explore some old drinks! though not sure if this is exactly anything old... but its fun to think so.


Cucumber Cooler

makes 1 cocktail

  • 1 2" piece of cucumber, thinly sliced crosswise, plus one additional slice for garnish
  • 1/8 tsp. fresh thyme leaves
  • 1 1/2 oz. vodka
  • 1/2 oz. simple syrup*
1. In a cocktail shaker, combine the cucumber slices, thyme, and 1⁄4 cup crushed ice. Using a muddler, crush ingredients until slushy. Add more ice, vodka, and simple syrup. Cover, shake vigorously to combine, and pour contents into a glass garnished with a slice of cucumber.

*to make simple syrup, heat 1 c water with 1 c sugar over medium heat. Stir until sugar is completely dissolved, do not boil. Remove from heat, cool completely. This will last in your fridge for months.

6.04.2009

(Almost) Flourless Chocolate Cake with Port & Balsamic Glazed Cherries

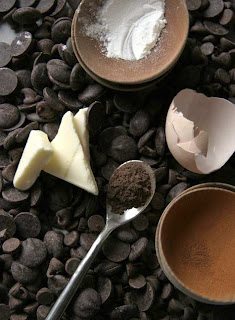
I have been DYING to make this recipe for a long time ever since I saw the pictures the blog, designspongeonline.com (which I will post here and cannot, by any means, take credit for). I mean, look at them. If you're mouth isn't salivating then you must be crazy.

Well, my good friend and dance buddy, Lauren, from Cal Poly came in town last Saturday to visit. She traveled all the way from the warm farm town of Yuba City to enter the June Gloom of San Francisco. Besides her inappropriate summer clothes, she brought with her a HUGE basket of bing cherries - picked from a tree in her very own back yard! My am I jealous! Then again, I'd have to live in Yuba City... Since we were hanging out for the day we decided it'd be fun to bake something with them. We both decided that chocolate would have to be the vessel (naturally). Finally, I found my excuse to make this lovely and delicious cake.

This cake is nuts. It is beyond good. I'm not sure about the readers here but sometimes I swoon when I eat certain foods (truffles, chocolate, balsamic vinegar, to name a few). I was swooning. This is super dense but still moist. I've made flourless chocolate cake before that was very dry and disappointing. This was not! The addition of cinnamon and espresso powder to this dish is what really makes it stand out. The bonus? Well, you have to use port for the reduction sauce which means you'll have leftovers to drink with your cake!


The Cake:

  • 12 - 14 oz chocolate ( I prefer 56% or higher cacao)
  • 2 Tblsp Cocoa powder (dark, dutch process is best!)
  • 1 1/4 tsp Cinnamon
  • 1 1/4 tsp espresso powder
  • 5 Tblsp Flour
  • 5 eggs
  • 1 1/4 cups sugar
  • 2 sticks unsalted butter (1 cup)

Cherries:

  • 1 pound cherries, stemmed, pitted (I recommend buying a pitter for this, Lauren saved me!)
  • 3/4 cup ruby Port ( I used Justin 'Obtuse' Port)
  • 1/2 cup sugar
  • 2 tablespoons balsamic vinegar

Directions:

1. Butter and Flour a 10" springform pan (or you can use a fluted torte pan so long as it has a removable bottom)

2. Set oven to 375º

3. Mix all dry ingredients together in a medium bowl. Set aside

4. Melt and stir butter and chocolate together over double boiler until everything is melted and smooth.

5. Beat eggs and sugar in mixer until starting to thicken.

6. Add remaining dry ingredients to mixer, and fold in slowly.

7. Slowly fold in melted chocolate to dry mixture so eggs do not curdle. You can temper it by adding a little of the warm chocolate mixture to the egg mixture first to raise the temperature.

8. Pour into pan and bake for 25-30 minutes.

9. While cake is baking, prepare cherry mixture

10. Stir cherries, port, sugar, and vinegar in heavy large skillet over high heat until sugar dissolves.

11. Bring to boil; reduce heat to medium and simmer until cherries are soft and wooden spoon leaves path in sauce when drawn across bottom of skillet, about 20 minutes. Remove from heat.

12. Pull cake out of oven to cool.

13. Serve cake with cherry compote.


Buon Appetito!
- Lindsay


5.14.2009

Strawberry Pie


I'd never had Strawberry Pie before and Brandon kept bugging me to make one for him.. So I waited until the Tennessee Strawberries were in season.. went down to the farmer's market and picked up a quart of the lovely red berries and made him that pie! (I think I nailed it).
So yeah - strawberry pies... turns out its a COLD pie. Something I'm not used to eating... apparently Shoney's makes one that he remembered from childhood - but I suggest DO NOT go to Shoney's to eat pie - or anything for that matter. It only takes a few ingredients and some patience and you have yourself a sweet strawberry pie.

Strawberry Pie
serves 8 - or 2

Ingredients:
  • 1 (9 inch) pie crust, baked
  • 1 quart fresh strawberries
  • 1 cup white sugar
  • 3 tablespoons cornstarch
  • 3/4 cup water
  • 1/2 cup heavy whipping cream
Directions:
  1. Arrange half of strawberries in baked pastry shell. Mash remaining berries and combine with sugar in a medium saucepan. Place saucepan over medium heat and bring to a boil, stirring frequently.
  2. In a small bowl, whisk together cornstarch and water. Gradually stir cornstarch mixture into boiling strawberry mixture. Reduce heat and simmer mixture until thickened, about 10 minutes, stirring constantly. Pour mixture over berries in pastry shell. Chill for several hours before serving. In a small bowl, whip cream until soft peaks form. Serve each slice of pie with a dollop of whipped cream.
Its really good I promise!

Posted by Lauren

Mexican Lasagna


Ok - First of all I have to apologize for not posting in forever!! But - I've been documenting past meals and have plenty of stuff to catch up with!
Anyway - I'd forgotten about this gem of a recipe that I'd first heard about from rachel ray. Ok - I'm sorry! I'm a foodie and I mentioned rachel ray! I don't condone watching her show... nor listening to any of her advice... but I have to give it to her that occasionally she does have a pretty decent recipe. So I made a few changes to the recipe and its quite tasty. It also holds up really well for plenty of leftovers!

Mexican Lasagna
serves 4-6

Ingredients:
  • 3 tablespoons extra-virgin olive oil
  • 1 1/2lbs ground turkey 0r chicken
  • 2 tablespoons chili powder
  • 2 teaspoons ground cumin
  • 1/2 red onion, chopped
  • 1 (15-ounce) can black beans, drained
  • 1 (14-oz) can fire roasted tomatoes, drained
  • 1 cup frozen corn kernels (or I roasted fresh corn and scraped off the kernals)
  • 2T ketchup or tomato paste
  • Salt
  • 8 (8 inch) flour tortillas, I think you may really only need 4 if you cut it just right!
  • 2 1/2 cups shredded Cheddar or shredded pepper jack
  • 2 scallions, finely chopped
  • 2T fresh cilantro
Directions:
  1. Preheat the oven to 425 degrees F.

  2. Preheat a large skillet over medium high heat. Add 2 tablespoons extra-virgin olive oil. Add onion and cook until tender. Add turkey and season with chili powder and cumin. Brown the meat, 5 minutes. Add fire roasted tomatoes and tomato paste/ketchup. Add black beans and corn. Heat the mixture through, 2 to 3 minutes then season with salt, to your taste. At the very end, throw in a few tablespoons of chopped fresh cilantro to taste.

  3. Coat a shallow baking dish with remaining extra-virgin olive oil, about 1 tablespoon oil. I find the either an 8x8 square or the 2 quart oblong size works. Cut the tortillas in half or quarters to make them easy to layer with. Build lasagna in layers of meat and beans, then tortillas, then cheese. I would suggest a slotted spoon when scooping the meat/beans, you don't want too much liquid or the lasagna will be runny. Repeat: meat, tortilla, cheese again. Bake lasagna 12 to 15 minutes until cheese is brown and bubbly. Top with the scallions and cilantro and serve.

Enjoy!
Posted by lauren

5.05.2009

Tres Leches Cake... well, really quatro

So I do realize that I'm WAYYY behind on posting recipes. I apologize. I truly do. But at least I'm not as behind as the person who's NEVER POSTED ANYTHING. Yeah, you know who you are.

Sorry for the obligatory pestering of a CERTAIN SISTER...

Anyway, back to food. I made this cake for a company pot luck for Cinco De Mayo. It is so so tasty. Each time I make it I like to vary what I add in regards to milk and to liquor (definitely had a heavy hand this time) but no matter what - it's moist, just sweet enough, spongy, and most importantly delectable. I always get rave reviews. See, I made it for Cinco De Mayo 2008 and this year I actually wanted to do something different. However, when my coworkers found out I wasn't going to make it they protested. Alas, I gave in. But it did not disappoint. It's now my go-to Cinco De Mayo dessert.

Ingredients

The Cake:

  • 8 large eggs, separated
  • 2 2/3 cups granulated sugar
  • 2 2/3 cups all-purpose flour
  • 2 1/4 teaspoons baking powder
  • 2/3 cup whole milk
  • 1 teaspoon vanilla extract

The Four Milks:

  • 1 14-ounce can evaporated milk
  • 1 12-ounce can sweetened condensed milk
  • 1 cup heavy cream
  • 1 can coconut milk
  • 1/8 cup dark rum or other liquer (roughly - I've also done variations with Disaronno & Frangelico)

The Topping (optional):

  • Whipping Cream
  • sugar
  • sliced strawberries
  • sliced mangoes

Directions

To make the cake: Preheat the oven to 350 degrees F. Lightly grease and flour a 11 by 15-inch baking dish and set aside.

In the bowl of a mixer, beat the egg whites on low speed until soft peaks form. Add the sugar gradually with the mixer running and peak to stiff peaks. Add the egg yolks 1 at a time, beating well after the addition of each.

Sift together the flour and baking powder and add to the egg mixture, alternating with the milk. When you do this, you'll split the flour mixture into thirds, adding the milk (divided in half) in between adding the thirds of flour. The goal is to start and end with the flour mixture. Also, do this quickly so the batter does not lose volume. Stir in the vanilla. Then, pour into the greased pan. Bake until golden, 30-35 minutes.

To make the cream topping: In a blender, or using a large bowl and a whisk, combine the evaporated milk, condensed milk, heavy cream, and liquor and blend on high speed.

Remove the cake from the oven and while still warm poke some holes in the cake and then pour the cream mixture over it. Let sit and cool to room temperature. Cover and refrigerate until well chilled, at least 4 hours or overnight.

Once cake is chilled and ready to serve, make the topping. Pour heavy whipping cream into a bowl and beat until it starts to thicken. Add sugar to taste. Continue beating until thick (but not too thick!). Spread over cake. Slice strawberries and mangoes and arrange over cake.

Buon Appetito!
-Lindsay


4.23.2009

Stromboli


I have to admit I got this idea off of Martha Stewart... again. I know - I need to quit watching daytime television. They also had a recipe in her Everyday Food magazine - another reminder that I was craving some stromboli. When I mentioned I was making it to Lindsay - she was instantly reminded of how her best friend from middle school - Erin's - mom (I don't know how to properly say that sentence... ) Anyway - I, too, remember one time eating at their house and having this.. So it brings back pleasant memories for Lindsay, and hopefully it will create new ones. How corny is that!
So a little bit about Stromboli... It's very similar to calzones... and you may even feel like you're eating a calzone when you eat this.. but its different in the sense that instead of creating a little "hot pocket" with the pizza dough, you actually roll out the dough.. sprinkle ingredients over it.. and then you roll it up into an oblong log and bake it. So if you're familiar with making like jelly rolls or something to that nature, its a very similar process. Ingredients are limitless - you can use marinara or pesto... ricotta or mozzerella... meat or veggies... You choose!

One of the bonuses of living in my neighborhood is that I have a little Italian market down the street, that sells fresh, homemade mozzerella.. and I have a local pizzeria that will sell you their fresh, unbaked pizza dough. I highly recommend using local ingredients if possible whenever cooking a meal... it just makes things taste better for some reason. I know Lindsay has access to a local pizzeria that sells dough.. I'm sure she's got plenty of cheese shops, too! But I feel like these homemade ingredients are far better than purchasing store bought.

Stromboli
serves 4

Ingredients:
  • 1lb pizza dough, thawed if frozen
  • 1/2c marinara sauce
  • 1/2lb fresh mozzerella (or shredded if you can't find fresh)
  • Flour for rolling out pizza dough
  • Salt & pepper
  • Any assortment of ingredients such as these (which are the ones we used):
  • broccoli
  • mushrooms
  • onion
  • roasted garlic
  • italian sausage
  • roasted red peppers
  • etc...
Directions:
  1. Preheat oven to 400 degrees F.
  2. Divide pizza dough into 4 equal portions. If you feel like the dough you have is a little small, then you may be able to only get 3 portions out of it. With your hands, try and shape each portion into about a 3" by 4" oval. Roll out to try and get it to be about 6" by 8" rectangle. Its ok if its not perfectly this size. If you have trouble rolling it out and it keeps springing back in place (I had this issue!) let the dough rest a few minutes and try again. I eventually gave up and pretty much stretched the dough using my hands. Again, doesn't have to be perfect.
  3. Once you have the dough rolled out, spread a couple spoonfuls of marinar sauce over the dough and spread, leaving about a 1/2" border around all the edges. Then sprinkle with your ingredients, trying not to over load it! This is important... keep in mind you will be rolling this up! So used ingredients that were cut into smaller pieces to make the rolling easier. Once you've put your veggies/meat on.. sprinkle the cheese over the top and season with salt and pepper. In order to roll up your stromboli, start with the smaller narrow end and roll, tucking in ingredients as you go. Finish with the seam side down. You don't need to worry about sealing the sides or anything. .. just leave it be. Cut 2 vents in the top to allow steam to escape.
  4. Place stromboli on a foil-lined baking sheet OR on a pizza stone if you have one. (When using a pizza stone, I find it best to sprinkle cornmeal over the stone to prevent sticking as well as giving the pizza a nice crispy crunch to it). Place in preheated oven and bake for about 15-20 minutes.. depending on the thickness/size of your stromboli. You want the outside to be nice and brown and crispy. And if you're using a pizza stone, make sure you preheated the stone for at least 20 minutes, too.
If making this for 2 - fear not... leftovers are just as good!

Enjoy!
Submitted by Lauren

4.22.2009

Butternut Squash & Pancetta Risotto

Risotto is one of those amazing and extremely versatile ingredients. You really can work with whatever vegetables, herbs or meat you have on hand. Sometimes I do zucchini, walnuts, and nutmeg. Other times I'll do champagne, pear and pecorino cheese. Risotto is the perfect comfort food for any evening. It can either be dressed down for a relaxing night at home or dressed up to impress your friends at a dinner party.

Furthermore, It's one of the few meals I make when I really feel like I can be creative and I'm not scared of how it will turn out. Just pick your favorite ingredients, a wine (red or white!), find some aged cheese such as pecorino and parmesean, pull out the chicken stock and you're ready to go!

I'm sure Lauren touched on this when she posted her risotto recipe, but please beware that you cannot try and do a lot of multitasking while making risotto. It requires constant love and attention. You must continue to stir despite the heat of the stove or weakness of your arm. Just keep going until it's a creamy perfection!

I realize that this is more of a recipe made in fall or winter, but living in San Francisco squash is available most of the year and we never seem to have warm nights. I always enjoy a good risotto and I hope that you do too.

Ingredients:


Butternut Squash
  • 2 tablespoons unsalted butter
  • 1 pound squash, cut into 3/4-inch cubes, divided
  • 1 teaspoon kosher salt
  • 1 tablespoon brown sugar
  • dash of cinnamon
Risotto
  • 5 cups chicken stock
  • 1 tablespoon olive oil
  • 1/4 pound pancetta, small dice
  • 1/2 cup minced shallots
  • 1 cup arborio rice
  • 1/2 cup freshly grated Parmesan cheese, plus more for serving
  • 2 teaspoon finely chopped fresh sage leaves
  • 1/2 cup white wine

Directions

For the butternut squash: In large skillet melt the butter over medium heat. Add half of the squash and season with salt. Cook for 6 minutes until golden on all sides. Add brown sugar and cinnamon and cook until the squash is caramelized and tender, but not mushy. Set aside and keep warm.

For the risotto: Bring chicken stock to a boil over high heat. Reduce the heat to low and keep warm. Heat olive oil in a heavy bottomed saucepan add the pancetta and the remaining squash and saute until lightly browned. Add the shallots, stirring until softened.

Pour in the arborio rice and cook for a few minutes, stirring until well coated and the rice becomes somewhat translucent.

Turn the heat to high and add the white wine, simmer until mostly absorbed.

Add the hot stock 1/2 cup at a time, stirring constantly until absorbed by the rice. It is very important that you continue to stir and do not add the next batch of liquid until the first one is absorbed. If I have the time, I'll even do it at 1/4 cup at a time to really allow it to slowly absorb the liquid. Continue to add stock 1/2 cup at a time, stirring to release the starch. Check rice for doneness after 18 minutes, rice should be al dente but cooked through.

Stir in sage, kosher salt, pepper, and Parmesan cheese. Gently fold in the squash. Serve immediately. Garnish with a few more shavings of cheese and a sprig of sage.


Buon Appetito!
- Lindsay

4.20.2009

Strawberry Mascarpone Tart with Balsamic Glaze


I finally had an excuse to make this! The cover of April's issue of Gourmet Magzine was this tart and I desperately wanted a reason to make it. It had a light pastry crust, a no-bake mascarpone filling, and topped off with macerated strawberries with a port glaze. Yes - the recipe calls for port. Unfortunately - Kyle lives in a "dry county" and due to the high alcohol content and addition of brandy to port wine, it was sold only in liquor stores. After searching downtown Dallas en route to Kyle's friends house, we only found 1 liquor store and port was not sold there (but they had plenty of 1.75L bottles of Gallo pink wine!). So after getting closer to her friends' house, we realized we had entered BACK into a dry county. Alright - time for a solution. What's the next best thing? Balsamic vinegar. Alright - now to find a grocery store!! Once again, found ourselves driving up and down streets in a mostly mexican neighborhood or something - because we passed plenty of supermercado's and discount food plus or whatever thats supposed to be - but I didn't think we'd find balsamic vinegar in a mexican grocery store. My dad was convinced, though. So we came upon a super super mercado - El Rio Grande! I bet they were the only 2 white people in there - and just like I thought... no balsamic. About ready to give up (well, I wasn't - I was counting on my dessert to be nothing short of amazing, and the absence of this ingredient would probably have ruined my whole weekend) we finally found a white super market. Yay! Balsamic vinegar was purchased and we were on our way!
Alright, enough cheese. But seriously - if you ever want to impress guests, make this dessert. It is really good!

Strawberry Mascarpone Tart with Balsamic Glaze
serves 8 (and seriously - no more!)

For tart shell:
  • 1 1/4 cups all-purpose flour
  • 3 tablespoons granulated sugar
  • Rounded 1/4 tsp salt
  • 7 tablespoons unsalted butter, cut into 1/2-inch pieces
  • 1 large egg yolk
  • 1/2 teaspoon pure vanilla extract
  • 1/2 teaspoon fresh lemon juice
  • 3 tablespoons cold water
For filling:
  • 1 1/2 lb strawberries (about 1 1/2 qt), trimmed and halved lengthwise
  • 1/3 cup granulated sugar
  • 3/4 cup ruby Port - or in my case, substitute with Balsamic Vinegar
  • 1 lb mascarpone (about 2 cups)
  • 1/4 cup confectioners sugar
  • 1 teaspoon fresh lemon juice
  • 1/2 teaspoon grated lemon zest
  • 3/4 teaspoon pure vanilla extract
  • 1T chopped fresh mint leaves (don't substitute with dry, just leave out completely unless you have fresh mint)
Equipment - a 10-inch fluted tart pan with removable bottom; pie weights or dried beans

Directions:

Make tart shell:

  • Blend together flour, sugar, salt, and butter in a bowl with your fingertips or a pastry blender (or pulse in a food processor) just until mixture resembles coarse meal with some roughly pea-size butter lumps. Beat together yolk, vanilla, lemon juice, and water with a fork, then drizzle over flour mixture and stir with fork (or pulse) until mixture comes together.
  • Gently knead with floured hands on a lightly floured surface until a dough forms, then gently knead 4 or 5 times. Press into a 5-inch disk. Place in center of tart pan and cover with plastic wrap. Using your fingers and bottom of a flat-bottomed measuring cup, spread and push dough to evenly cover bottom and side of pan. Prick bottom of tart shell all over with a fork and freeze until firm, about 10 minutes.
  • Preheat oven to 375°F with rack in middle.
  • Line tart shell with foil and fill with pie weights. Bake until side is set and edge is pale golden, about 20 minutes. Carefully remove foil and weights and continue to bake until shell is deep golden all over, about 20 minutes more. Cool in pan, about 45 minutes.

Make Filling While Tart Shell Cools:

  • Stir together strawberries and granulated sugar in a bowl and let stand, stirring occasionally, 30 minutes. Strain in a sieve set over a small saucepan, reserving berries. Add Port (or balsamic) to liquid in saucepan and boil until reduced to about 1/4 cup, 10 to 15 minutes. Transfer to a small bowl to cool slightly.
  • Meanwhile, whisk together mascarpone, confectioners sugar, lemon juice, zest, vanilla, and a pinch of salt until stiff.

Assemble Tart:

  • Spread mascarpone mixture evenly in cooled tart shell, then top with strawberries. Drizzle Port glaze all over tart. I would suggest waiting until near time to serve before topping the tart, otherwise the glaze may start to spread and the tart will be slightly less attractive. I also added some fresh chopped mint to the strawberries for color.


Hope you enjoy as much as we did!

Submitted by Lauren

Easter Dinner

I realize Easter was over a week ago - so this post is a little late. But maybe it will help you decide what you'd like to do for your Easter meal! Or maybe it will help remind me about the recipes used, so I can do it again next year. Whatever the reason - I hope it helps your decision making a little easier.


We made a crown roast of Lamb with a mint pesto rub, served with a honey mascarpone sauce, a potato & leek galette, and roasted asparagus. The lamb rack was perfect!! We got lucky and the butcher had a crown rack on display he was ready to sell, so he sold it to us for a deal - plus the rack was already frenched! How lucky is that! The rub was a perfect substitution to the typical mint jelly often served alongside lamb and the honey mascarpone added a nice creamy element to the whole dish that was totally unexpected.


The potato & leek galette I hade made the previous Easter and thought it was a fun side dish that offered great presentation as well as a fun substitude for mashed potatoes, baked potatoes, roasted potatoes, scalloped potatoes, or whatever else you can think of.. Instead you get this pretty little wedge on the side.


So on to the recipes!


Crown Roast of Lamb
serves 8

Ingredients:
  • 2 racks of lamb, about 1 1/2lbs per rack or 8 ribs per rack, frenched
  • 1 recipe mint pesto, recipe follows
  • 1 recipe honey mascarpone, recipe follows
  • salt & pepper
Directions:
  1. Season lamb on both sides with salt & pepper. Rub mint pesto over entire lamb racks. Refrigerate for at least 2 hours.
  2. Preheat oven to 350 degrees.
  3. Tie up racks to resemble crown - I'd tell you how to do this, but I didn't do it myself.. so you'll have to just go with it.
  4. Place on rack set up ontop of a sheet pan/roasting pan. Let sit at room temperature for at least 30-60 minutes (this helps the roast to cook more evenly)
  5. Roast lamb until a thermometer reads 130 degrees (for medium rare) - about 20 minutes/lb.
  6. Let lamb rest for at least 20 minutes - temperature will continue to rise about 10 more degrees.
  7. Slice between ribs and set on top of mascarpone sauce on plates.. Or drizzle sauce on top.
Mint Pesto

Ingredients:
  • 1 cup (firmly packed) fresh mint leaves, plus more for garnish (optional)
  • 1/4 cup chopped walnuts
  • 1/4 cup grated Parmesan cheese
  • 2 clove garlic, sliced
  • 1/4 teaspoon ground black pepper
  • 1/4 teaspoon salt
  • 3 tablespoon olive oil
Directions:

In the bowl of a food processor fitted with a chopping blade, process mint leaves and walnuts for 30 seconds. Add Parmesan cheese, garlic, pepper, and salt; pulse until mixed. With motor running, slowly add oil through feed tube until pesto mixture is smooth and well combined. You may need more oil, depending on how thin or thick you want the pesto to be.

Honey Mascarpone Sauce

Ingredients:
  • 1/2 cup creme fraiche (or if you can't find this, you can substitute w/sour cream)
  • 3 tablespoons honey
  • 3/4 tablespoon ground cumin
  • 2 tablespoons chopped fresh mint leaves
  • 1/2 cup mascarpone cheese, at room temperature
  • Kosher salt and freshly ground black pepper
Directions:

In a small bowl, combine the creme fraiche, honey, cumin, and mint. Add the mascarpone cheese and stir until just combined. Season with salt and pepper, to taste.


Potato & Leek Galette
serves 6-8

Ingredients:
  • 6 tablespoons butter, melted
  • 3 pounds (5 to 6 medium) baking potatoes, peeled
  • Coarse salt and ground pepper
  • 1 leek, white and light-green parts, thinly sliced crosswise, well washed
  • 6 ounces Gruyere cheese, coarsely grated (about 1 1/2 cups)
Directions:
  1. Preheat oven to 375 degrees, with rack set in top third. Line bottom of a 9-inch cake pan with a round of parchment paper. Place melted butter in a large bowl. Using a mandoline or cutting by hand, slice the potatoes 1/8 inch thick; add to bowl with butter. Season with salt and pepper, and toss to coat. In prepared pan, arrange some of the potatoes around edge of pan, overlapping the slices.
  2. Fill center of pan with more overlapping slices. Sprinkle with half the leek and half the cheese; season with salt and pepper. Repeat with another layer of potatoes and remaining leek and cheese; season with salt and pepper. Top with remaining potatoes. Using a spatula, press galette down firmly.
  3. Bake until potatoes are tender, 70 to 80 minutes, pressing down firmly twice with a spatula during cooking. Run knife around edge of pan. Carefully invert galette onto a plate, remove parchment, and reinvert onto serving plate. Cut into wedges, and serve.

And as for roasted asparagus - well I shouldn't have to tell you how to do that!


The finished product:


Hope you try this recipe sometime - I think it would go over well with beef tenderloin as well.

submitted by Lauren

Savory Egg Pudding!


I bet you're thinking - that doesn't look like a picture Lauren took! Well, you're right. I kinda forgot to take a picture.. so I stole it from the site where I stole the recipe! I got it from Chowhound - if anyone is familiar with that site, it's great! It offers up loads of help from discussion boards to recipes. You can find the recipe here.
For Easter brunch, we were trying to come up with a replacement egg dish instead of our popular egg casserole (which uses bacon).. we needed a vegetarian dish so we decided to try something completely different. Lindsay and I have done souffle's before, but those are work and I didn't want to have to put forth more effort than it was worth. This dish was quick, simple, and very tasty... plus it makes great leftovers the next morning! It's close to a quiche in texture.. but there is no crust involved. simple!

Savory Egg Pudding
serves 4-6

Ingredients:
  • 1/4 cup all-purpose flour
  • 1 cup half-and-half
  • 3 large eggs
  • 1 large egg yolk
  • 1 cup heavy cream
  • 2 medium red potatoes, halved lengthwise and thinly sliced (about 2 1/2 cups) You can also use yukon gold potatoes
  • 2 tablespoons fresh Italian parsley, finely chopped
  • 2 teaspoons fresh tarragon, finely chopped
  • 1 teaspoon finely grated lemon zest
  • 2 tablespoons unsalted butter
  • 2 medium leeks, white and pale green parts only, halved lengthwise, rinsed, and thinly sliced crosswise
  • 1 medium garlic clove, peeled and minced
Directions:
  1. Heat the oven to 375°F and arrange a rack in the middle. Coat a 2-quart baking dish with butter and set aside.
  2. Combine flour, 1/2 of the half-and-half, eggs, and egg yolk in a large bowl and whisk until smooth. Add cream and remaining half-and-half, season well with salt and freshly ground black pepper, and whisk to combine; set aside.
  3. Combine potatoes, herbs, and zest in a large bowl and toss to coat; set aside. Heat butter in a large frying pan over medium heat. When it foams, add leeks and garlic, and season with salt and freshly ground black pepper. Cook until leeks are soft, about 5 to 6 minutes.
  4. Mix cooked leeks into potato mixture and season with additional salt and freshly ground black pepper. Evenly spread potato mixture in the prepared baking dish and pour egg mixture over potatoes.
  5. Bake until custard is puffy, golden, and set, about 30 to 35 minutes. Let rest at least 20 minutes before serving. Can be served warm, room temperature, or cold.
Serve with coffee cake, bacon, and bloody marys or mimosas!

Submitted by Lauren


4.18.2009

Penne with Asparagus and Cherry Tomatoes


Here's a recipe that's one of my go-to recipes for week nights as it's quick, light, and fresh.

Ingredients

  • 8 ounces penne pasta
  • 3 tablespoons olive oil
  • 2 garlic cloves, minced
  • 1 1/2 pounds thin asparagus, trimmed and cut into 1-inch pieces
  • Salt and freshly ground black pepper
  • 2 cups (about 9 ounces) cherry tomatoes (preferably heirloom tomatoes)
  • 1 cup shelled fresh peas
  • 1/2 cup low-sodium chicken stock
  • 1/2 cup grated Parmesan
  • 1/2 cup ricotta cheese
  • 2 tablespoons chopped fresh basil leaves
  • 1 lemon, zested

Directions

Bring a large pot of salted water to a boil over high heat. Add the pasta and cook until tender but still firm to the bite, stirring occasionally, about 8 to 10 minutes. Drain the pasta, reserving about 1/2 cup of the pasta water.

While the pasta is cooking heat the oil over medium-high heat in a large saute pan. Add the garlic and cook until fragrant, about 1 minute. Add the asparagus, season with the salt and pepper, and cook for 3 minutes until slightly soft. Add the cherry tomatoes and peas. Cook for 2 minutes. Pour the chicken stock into the pan and bring the mixture to a simmer. Cook until the tomatoes start to burst and the stock is reduced by half, about 3 minutes.Take a microplane out and zest the lemon on top of the pasta. Stir to mix.

Add the cooked pasta, ricotta, and 1/2 of the Parmesan to the saute pan with the vegetables. Toss well, adding reserved pasta water, if needed, to loosen the pasta. Garnish with the remaining Parmesan and chopped basil.


Buon Appetito!
- Lindsay

4.16.2009

Strawberry Ricotta Muffins


I made these guys for breakfast one morning. Though slightly time consuming due to roasting the strawberries the aroma that will fill your house is well worth the wait! The reason the strawberries are roasted is so that they become slightly "dehydrated."

See, strawberries are a very juicy ingredient. Any baker knows that trying to actually bake with them can be tricky as the liquid that eventually releases itself into any batter ends up changing the dynamics of the batter because of it. So, the work-around is to roast the strawberries. By roasting the strawberries they release their juices in the roasting pan, not your batter, and as a result their sweetness is concentrated and their shape will hold in whatever you are making. And oh man, the smell. The smell! So amazing. It brought me back to being at home when my mom would make her homemade preserves. It's an intensly sweet aroma that's just the prequel to what's to come.

These muffins are extremely light and fluffy and most definitely moist. They hold up for days as well!


Ingredients:
  • 2 cups medium strawberries
  • 3/4 cup ricotta
  • 2 large eggs
  • 1/2 tsp. vanilla extract
  • 10 Tbsp. butter melted and cooled, divided
  • 2/3 cup sugar
  • 1 tsp. lime zest
  • 2 cups flour
  • 2 tsp.baking powder
  • 1/2 tsp. salt
  • 1/4 tsp. baking soda
Directions:
  1. Preheat oven to 350 degrees. Gently wash, hull, and cut strawberries into quarters. Place berries on a cooling rack over a sheet pan. Bake until strawberries are partially dried, about 45 minutes. Let cool.
  2. Increase oven to 400 degrees. Brush a 12-mold muffin tin with 2 Tbsp. melted butter. Set aside.
  3. In a bowl, whisk together ricotta, eggs, and vanilla. Stir in remaining butter.
  4. In a large bowl, use your fingertips to rub together sugar and lime zest until sugar is moist. Mix in flour, baking powder, salt, and baking soda. Use a spatula to gently but quickly fold ricotta mixture into dry ingredients. Don’t overwork it. The batter will be thick and heavy, much thicker than most batters so don't be alarmed! Stir in strawberries and spoon batter evenly into muffin tins. Bake until tops of muffins are golden and springy to the touch, about 20-25 minutes.

Makes 12 muffins


Buon Appetito!
- Lindsay

Salmon with Roasted Pineapple-Mango Salsa, Fried Plantains, and Coconut Rice

It all started when I ran into my local produce market to grab some kombucha as I'm on a kick as of late... (more on that some other time). In front of the market there are bins of fruit sitting out - tangerines, mangos, papayas, lemons, and oranges, and oh the pineapple! There they were lots of large and perfectly ripe pineapple. They caught my eye, sure, but when the aroma of them lingered I knew I had to buy one.

Right below the perfectly ripe pineapple were the perfectly ripe plantains. And if you aren't familiar with plantains that means they're black and not yellow like a traditional banana. So my impulses gave in and bought a large pineapple and two large plantains. Now since I was just running out I didn't have time to go shopping. However, as I began the climb up 14th st to my house the ingredients of mango salsa began running through my head. Suddenly, I was scolding myself for not having bought all of the ingredients. And so the idea of my meal had grown from an impulse into a menu...

This menu will bring you directly to the Caribbean. It's full of flavor and bright colors. It will not disappoint. But if you really want to go to the Caribbean you'll need to make a Painkiller to go along with it. I'll let Lauren do the honors of posting that recipe here some other time.

Salmon with Roasted Pineapple-Mango Salsa

Ingredients:
  • Salmon filets
  • Salt and pepper
  • Mango Salsa

Salsa:
  • 1/2 C diced roasted pineapple (see instructions below)
  • 1/2 C diced mango
  • 1/4 C minced green bell pepper
  • 1-2 limes, juiced
  • 1/4 C diced red onion
  • 1/2 C diced firm ripe tomato
  • 1 red chili pepper minced (no seeds)
  • 1/2 t sea salt
  • 1/8 t ground black pepper
To prepare the roasted pineapple:
Preheat the oven to 350˚F. Remove the pineapple skin and slive lengthwise - approximately 1/4" thick. Spread out on a sheet pan lined with foil and bake for approximately 25 minutes, or until the pineapple releases its liquid. Remove pineapple center core and dice.

To prepare the salsa:
Dice all fruits and vegetables and place in a bowl. Squeeze out the the juice of 1-2 limes (depending on how juicy, roughly 2T) over the diced ingredient. Season with salt and pepper. Let sit at room temperature for up to 2 hours. It's important to let the ingredients rest for at least 30 minutes so all flavors can combine.

To prepare the Salmon:
Preheat broiler. Place salmon on a metal baking sheet and spring with kosher salt and freshly ground black pepper. Broil fish until it just starts to firm and is no longer translucent (5-7 minutes depending on how thick your fish is). Turn fish over and broil 2 minutes longer. Transfer to plates and top with Pineapple-Mango Salsa.


Fried Plantains with Brown Sugar Rum Sauce

Ingredients:
  • 2 very ripe plaintains (black)
  • 1 C dark rum
  • 1/3 C packed brown sugar
  • 2T butter
  • 2T canola oil
  • pinch of salt
Heat grill to high. Place rum, brown sugar, and salt in a small saucepan and cook until the sugar has melted and the mixture reduces and thickens slightly. Stir in butter until melted. Remove from the heat.

While making the brown sugar rum sauce, peel and slice plantains 1/2" thick on the bias. Place butter and oil in a pan over medium heat. Once pan is heated place plantains in. Cook for about 10 minutes, or 5 minutes per side. Depending on how ripe your plaintains are they may carmelize quickly. This is a good thing! Just keep on eye on them to see how carmelized, or charred you like them. The rum sauce and plantains should finish about size. Drizzle sauce over plantains once complete.


Coconut Rice

Ingredients:
  • 1 1/2 cups long-grain rice
  • 1 T olive oil
  • 1 (14-ounce) can unsweetened coconut milk
  • 2/3 cup water
  • 1 teaspoon salt

Directions:In a large saucepan, heat the oil over medium-high heat. Add the rice and stir to coat with the oil. Add the coconut milk, water, and salt; bring to a boil. Cover, reduce heat to low, and simmer about 20 minutes or until the liquid is absorbed.

Remove the rice from the heat and fluff with a fork. Place a clean, dry dish towel over the pan, cover with the lid, and let steam for 5 minutes before serving.


Buon Appetito!
- Lindsay

4.15.2009

Baked Halibut with Citrus Compound Butter


Alright - I had to hurry up and post this recipe before it left my head! Oh man - this dish is amazing! Imagine a warm spring night and you're craving something flavorful, citrus-y, and light. So instantly you think white fish... lemon.... ohhhh how can we turn this into something delicious! So Halibut filets were on sale at Whole Foods, so thats how we decided on the fish... And we were already planning on making some sangria, so we knew we'd have oranges and lemons on hand... So I immediately thought of a compound butter! Sure, butter is "heavy", but its not like a cream sauce... and it still adds a sort of richness to the dish without weighing it down in a sauce.
So we served it atop of some brown basamati rice with some roasted spring veggies... mmm. Perfect ending to a lovely spring evening.
So on to the recipe!

Baked Halibut with Citrus Compound Butter
serves 4

Ingredients:
  • 4 halibut filets, about 6-8oz each
  • paprika
  • salt & pepper
  • 1 stick of butter, room temperature
  • zest of 1 lemon + juice
  • zest of 1 orange + juice
Directions:
  1. Combine softened butter, zest from orange and lemon, about 1 T juice from each fruit, a pinch of salt and about 1/2t paprika in a small bowl. Once you've managed to combine the liquid into the oily solid butter (this will take time, and you probably will splash yourself a few times), taste the butter. If it's too salty - maybe add a touch of sugar, or some more juice to offset the saltiness. If it needs more salt, well add some! Adjust the seasonings to your liking.
  2. Once you've got the butter right, roll it up in some parchment paper to create a log. If you don't have parchment paper, then I would go ahead and scoop the butter into personal size portions and refrigerate it. Create about 4 serving sizes, and then leave the rest in the bowl (it's about half and half).
  3. Lay out your Halibut, season with paprika, salt and pepper (unless your butter is salty, then don't use anymore salt! I guess its obvious our butter got a little too salty). Rub the remaining butter over the tops of the halibut to cover them.
  4. Heat oven to 350 degrees. Place halibut on a sheet pan and bake for about 10-15 minutes, depending on thickness of the fish.
  5. Once fish easily flakes away with a fork, its ready! Serve with a piece of the compound butter on top and eat!

I promise this won't disappoint! It was really really really good. And I know - its alot of butter - but its worth it. Most of it melts off anyway. haha.. enjoy!

Submitted by Lauren!

4.13.2009

The Perfect Bloody Mary Mix

It's a "good thing". Hint - its a Martha Stewart recipe with some minor adjustments. For Easter brunch - what better accompaniment than a refreshing spring cocktail? Sure sure... mimosas are delicious, too - but come on.. those need no recipe. Orange juice and Champagne. But with family in town (one who would probably enjoy a drink at every meal), a boyfriend who loves bloody mary's, and a dad who loves tomato juice... I figured it'd be fun to start a new tradition of a brunch cocktail for the holidays!
I remembered watching an episode last fall of the Martha Stewart Show, where she was coming up with homemade gift ideas - one being a bloody mary mix. I thought - that's a great gift idea! But, at the same time - it's highly perishable. So if I were to make it as gifts, they'd have to get it the day I made it, and then use it within 4 or 5 days. No thanks! So instead, I tucked it away for future use... and it came to me this weekend. I like it because it doesn't come off a grocery store shelf, its made from ingredients you most likely have on hand, and you can adjust the heat level. Thats the big thing for me - I can't handle heat! So here is your recipe...

Bloody Mary Mix
adapted from Martha Stewart
serves 4-6

Ingredients:
  • 4 cups tomato juice
  • Juice of 2 large lemons
  • 1 to 2 tablespoons Worcestershire sauce
  • 1 heaping tablespoon prepared horseradish
  • 1 1/2 cloves garlic, passed through a garlic press
  • 2 teaspoons coarsely ground pepper
  • Celery salt, to taste
  • 1/4 to 1/2 teaspoon Tabasco sauce
  • Unflavored vodka, to taste
  • Lemon wedges, for serving
  • Celery sticks, for serving and munching
Directions:
  1. Place tomato juice in a large container with a tight-fitting lid. Add lemon juice, Worcestershire sauce, horseradish, garlic, pepper, and Tabasco; shake vigorously. Taste, and adjust for seasoning; the mixture should be quite spicy.
  2. Pour 1 part vodka and 3 parts Bloody Mary mix over ice in a shaker. Shake well. Pour into glasses. Squeeze a wedge of lemon over drink (do not subsequently stir or shake drink), discard used wedge. Garnish with a large stick of celery (reserve extra stalks for munching) and a large lemon wedge. Top with some fresh cracked pepper and celery salt.

So to adjust the heat - of course just adjust the tabasco amounts. The only things I changed from this recipe were the addition of the celery salt, the cracked pepper on top, and NOT squeezing fresh lemon juice on top of the drink... oh and I used maybe 1/4t tabasco - and let Brandon use an additional teaspoon in his glass alone. So really - this is a highly enjoyable drink. I never used to like them due to the heat factor, but always wanted to - and now I can. Thanks, homemade bloody mary mix!

enjoy!

submitted by Lauren!

4.08.2009

Brandon & Lauren's Version of Sangria

Yeah - So I call it our "version" of sangria - because we basically searched through a few recipes and came up with an amalgamation of sorts.. and I don't know if there is one "true" recipe for Sangria or not... Everyone has their own way of doing it. So here's what we came up with:

Sangria
serves way more than 2 people

Ingredients:
  • 1 bottle dry spanish red wine
  • 1/2c white rum
  • 2c orange juice
  • 8oz strawberries
  • 2 Lemons
  • 2 Oranges (we used one blood orange & one navel orange)
  • 1/2c simple syrup (Or you could just use some granulated sugar)
  • 1 bartlett pear
  • Club Soda
Directions:
  1. Chop up the pear, strawberries, one lemon, and oranges into larger bite size pieces.
  2. Put chopped up fruit into a VERY LARGE Pitcher. Squeeze juice from one Lemon over fruit. Add rum, orange juice, and simple syrup. At this point you could let it soak for a few hours before adding the red wine, if you'd like. I took this opportunity to kinda mash up the fruit a little. Or "muddle" if you will.
  3. Add the red wine.
  4. Chill for a few hours.
  5. When read to serve, pour over a tall glass of ice and add a splash of club soda.
  6. Enjoy on a nice warm evening!

So the strawberries turned out to be a really nice touch - they give off a really unique flavor when allowed to soak for awhile. If the pitcher gets too full of fruit, you may want to take some out and put in a separate bowl and add back in later. Make sure you have enough room for the wine!

Posted by Lauren

4.03.2009

Ribeye Steak w/Blueberry Port Reduction


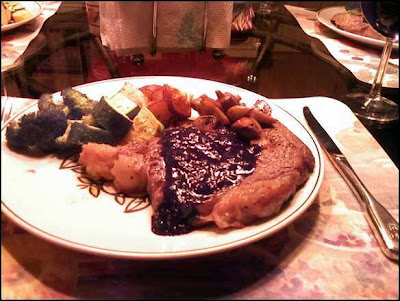
Alright - not the best picture. Sorry.
So anyway -- I was at my parents house and wanted to make dinner (and since I was using their credit card, the sky was the limit, right?) Plus - having a vegetarian for a boyfriend, I was craving red meat. Then I had to figure out something to dress up the steak that my dad would actually eat. I was reminded of a blueberry sauce that was served with a filet I had while dining out in Florence, Italy. (Lindsay - help me out with the name of this place?) It was kinda the best steak/sauce I'd ever had. I think once we tried to "recreate" it, but failed. So it was time to give it another shot. Really, this sauce would go well with a lot of meats - probably better with more "gamey" meats... like elk or duck or lamb or venison.. is lamb gamey? whatever.
So it turned out to be a pretty delicious sauce - just be careful, because it calls for beef stock (i only had beef broth on hand) and when you reduce it to a fourth of its original state, the flavor strengthens... as does the salt. So I'd suggest getting maybe a low-sodium version. That was my only drawback of this recipe... it was a tad salty. OR you could offset it and maybe add more sugar. Ok enough talk.

Blueberry Port Reduction Sauce:
serves 4

Ingredients:
  • 1 1/2c Port
  • 1c beef stock
  • 1c (6oz pkg) blueberries
  • 1 shallot, finely chopped
  • 2t sugar
  • 1t finely chopped mint (or you could use thyme or rosemary)
Directons:
  1. In a medium sauce pan, stir together port, beef stock, blueberries, shallot, and sugar.
  2. Bring to a boil on high heat
  3. Reduce heat to medium and boil, stirring occasionally, until reduced to 1/2c. About an hour.
  4. Stir in mint, serve warm.

So the way that I prepared the ribeye steak - I seasoned the steaks with salt & pepper. I heated a cast iron skillet over medium heat and added vegetable oil. I seared the steaks in the pan for about 2 minutes on the first side... until they got a golden color.. then I flipped them over to sear the meat another 2 - 3 minutes. I then moved the skillet into a 400 degree oven and let it roast for about 10 minutes. This all depends on the thickness of your steaks, of course. If the steaks are thin, I'd say to roast it for less time.. also it depends on how you like your meat. I want mine medium rare. Once you remove the skillet from the oven, let the steaks rest for at least 5 minutes before serving.
I served the steaks with a side of roasted potatoes, squash, and broccoli and some caramelized mushrooms. yum!

Enjoy!

Submitted by Lauren

3.30.2009

Potato & Leek Crepes with Creamy Tomato Sauce


I always forget how much I LOVE crepes! They have to be the most versatile food out there.. I mean you can stuff just about anything in them and they always turn out impressive. I think I first discovered my true love for crepes when I was in Brighton Beach, England.. and on the pier they had a crepes stand and they served it made to order with a lemon sauce... It was so simple and delicious!
Later I came to discover its versatility on making several trips to Marche and Margot in East Nashville. I always struggle to order something other than the crepes! I think my favorite was at Margot on one sunday morning... where they had crepes with smoked salmon, asparagus, cream cheese, and fried capers. Oh my god. I never knew how amazing fried capers could be! By the way, Margot is the best restaurant in Nashville and they serve an amazing Sunday Brunch!
Alright so on to the food. I was trying to come up with an idea for dinner.. and I wanted something "seasonal"... and it hit me - I wanted crepes. So when I mentioned to Brandon (without telling him I'd actually kinda decided i wanted potato and leek crepes) that I wanted crepes... he was like "yeah! maybe something with potatoes and leeks?" Alright. Now - I think that explains why he's my boyfriend right there.

Potato, Leek, & Goat Cheese Crepes with Creamy Tomato Basil Sauce
serves 4

For the Crepes:

Ingredients:
  • 2 large eggs
  • 1/4 t salt
  • 1 c all purpose flour
  • 1 1/4c milk (do not use lowfat or nonfat)
  • melted butter
Directions:
  1. Whisk together eggs and salt in large bowl
  2. Gradually whisk in flour and milk.
  3. Strain into medium bowl, let stand for at least 1 hour. (but if you're in a hurry, let stand for at least 30 minutes.)
  4. If necessary, add more milk by the tablespoon to have the mixture resemble the consistency of heavy whipping cream. (after you've let it set, of course)
  5. Heat an 8" nonstick skillet over medium - medium high heat. Brush with melted butter. (if butter begins to brown too quickly, turn down the heat)
  6. Pour about 1/4c of batter into center of skillet and swirl to coat entire bottom of skillet. Cook until top appears to be dry, loosening sides of crepe with rubber spatula, about 45 seconds.
  7. Turn and cook until brown spots appear on second side, about 30 seconds (but again, may be longer depending on temperature of skillet).
  8. Turn crepe out onto plate. Repeat with remaining batter, brushing skillet with melted butter between each crepe.
  9. Stack crepes on plate.
For the Tomato Sauce:

Ingredients:
  • 1 15oz can crushed or diced tomatoes
  • 1/4c chopped sweet onions (i just used leeks, since that was what i had on hand)
  • 1 clove chopped garlic
  • 1/2c-1c heavy cream
  • fresh basil
Directions:
  1. Sautee onion and garlic in about a tablespoon of olive oil over medium heat in a medium saucepan, until onion is softend - about 5 minutes (but careful not to burn the garlic!)
  2. Add can of crushed tomatoes and simmer for about 10 minutes.
  3. Slowly stir in the heavy cream and let simmer another 10 minutes (so sauce thickens a little).
  4. Toward the end, add in freshly chopped basil.
  5. Taste - maybe you'll want to add more cream or salt or pepper at this point.
For the Potato & Leek Filling:

Ingredients:
  • about 1 1/2lbs of new potatoes/red potatoes
  • 2-3 leeks, chopped
  • 2 gloves of garlic, chopped
  • 4oz log of goat cheese
  • olive oil/butter
  • salt & pepper
Directions:
  1. Wash the red potatoes and place in a large saucepan. Fill sauce pan to cover potatoes with cold water. Bring to a boil and salt the water.
  2. Boil potatoes for about 25 minutes - depending on the size. Potatoes should be tender when poked with a knife, but not falling apart.
  3. When cooked, strain and let cool slightly.
  4. Peel Potatoes and then slice into 1/4" slices (or whatever you feel like is bite size for you. wing it) Set aside.
  5. Wash Leeks by slicing in half lengthwise and running under cold water. Most of the leeks will unfortunately be wasted as you can't really use much of the green part. About 4" of the base is whats usable. Once they are washed, chop off the roots and the tough green leaves of the top. Then roughly chop (ya know, about 1/4" slices).
  6. Heat olive oil and/or butter in a large nonstick skillet, about 2 tablespoons or so. Sautee leeks and garlic over medium heat until leeks have softened (again don't allow garlic to burn). Add sliced or chopped potatoes and continue to stir and cook over medium heat...(adding more oil if necessary) letting the potatoes get slightly golden and absorb the leek/garlic flavor. This is best to do while the potatoes are still slightly warm from being boiled earlier... they absorb more flavor this way. Set aside.
  7. Once Crepes have been cooked, begin to assemble.
  8. Sprinkle some crumbled goat cheese on the crepe, add a little potato leek mixture, fold in half and then fold over to create sort of a triangle shape. Repeat with remaining crepes/potato mixture.
  9. Top with the creamy tomato basil sauce. Serve hot! (crepes cool down reaaallly fast, so make sure the filling and the sauce are hot so that the dish isn't completely cool!)
And there you have it. Three components combined together to create one delicious dish. I saved the remaining crepes that we didn't eat to use at a later time.. Maybe I'll throw in some chopped bananas and warm nutella for a delicious breakfast some morning. Crepes are really versatile so I encourage you to come up with any flavor combination you so desire.. and then throw it in a crepe for a meal! I think Martha Stewart recently had an entire section of her magazine dedicated to the crepe a few months back... let me find it so I can post a link here.
Yeah - that is where you can learn the basics of crepes.. and from there you can find a whole list of recipes for crepes.

Enjoy!
Posted by Lauren