Showing posts with label dessert. Show all posts

7.29.2010

Almond Plum-Cherry Buckle.... a mouthful


I couldn't resist the grocery aisle full of sweetly scented plums (that's for you Lindsay), and even though I was shopping on a budget - these are in season, so luckily it wasn't going to really affect my spending too much. But - what should I now do with
all these plums? I mean, I love to think I'm the kind of person who has this lovely basket of fruit that sits on my kitchen counter and whenever I get a sweet tooth I reach for some fruit.. but no, fruit never really satisfies my sweet tooth and I tend to skip over it. I usually end up cutting it up and putting it in my oatmeal or yogurt. Unfortunately ever since the flood, ants have taken up some kitchen front property in my cabinets and every 2 weeks they show up in large numbers and feed on their sweet sweet poison... and slowly taper off and are gone completely... and then it rains! And they are back!! Ahhh I've chosen to just live with it because no matter how hard I fight them, I can't win. So - long story short, ants = no fruit on the counters.

So! To satisfy my sweet tooth with fruit, I bake with fruit! I found a recipe on epicurious for an Almond-Plum Buckle... so I thought - thats it! I didn't want a tart with a heavy shortbread crust and loads of mascarpone (although, that would be nice) but no - I'm kinda trying to watch my diet these days, so I needed something a little healthier. So I came across this recipe, which uses ground almonds and I substituted some wheat flour in as well... and I guess in my head, that means its "healthier". Oh - and I originally thought I wouldn't have enough plums, so I labored over a bowl of cherries with an unwound paperclip and began the task of pitting cherries to throw in with it to make sure I would be covered in the fruit to cake ratio. Well - turns out I was wrong, I only used half of the plums! Figured I'd throw in some cherries anyway. On to the recipe!

Almond Plum-Cherry Buckle
adapted from epicurious.com
Serves 8-10

Ingredients:
  • 1/2 cup whole almonds (about 2 1/2 ounces)
  • 1 cup all purpose flour
  • 1/2 cup whole wheat flour
  • 1 teaspoon baking powder
  • 1/4 teaspoon fine sea salt
  • 1 cup (2 sticks) unsalted butter, room temperature
  • 1 cup plus 4 teaspoons sugar, divided
  • 2 large eggs
  • 1/4 cup buttermilk
  • 1 teaspoon vanilla extract
  • 1/2 teaspoon almond extract
  • 4 plums, any variety, halved, pitted and then each half cut into 4 slices*
  • 15 cherries, pitted
  • 3/4 teaspoon ground cinnamon
Directions:
  1. Position rack in center of oven and preheat to 350°F. Spray 9-inch-diameter spring-form pan with 2-inch-high sides with nonstick spray. Line bottom of pan with parchment paper round.

  2. Finely grind almonds in processor**. Transfer to medium bowl; whisk in flours, baking powder, and salt. Using electric mixer, beat butter in large bowl until fluffy. Add 1 cup sugar; beat until well blended. Add eggs 1 at a time, beating well after each addition. Alternate flour mixture and buttermilk, beginning and ending with the flour. Mix just until incorporated. Beat in vanilla and almond extract.

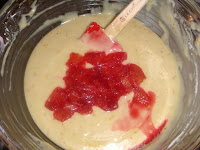
  3. Transfer batter to prepared pan; spread evenly and smooth top with spatula. Gently press plum slices, flesh side down, into batter in spoke pattern around outer rim and center of cake, placing close together. Fill gaps with cherries. Mix cinnamon and 4 teaspoons sugar in small bowl. Sprinkle over plums and cherries.

  4. Bake cake until tester inserted into center comes out clean, about 50 minutes. Cool cake in pan on rack 20 minutes. Run small knife between cake and pan sides to loosen. Now you can either leave the cake on the springform pan plate or you can invert cake onto platter; remove parchment paper. Place another platter atop cake. Using both hands, hold both platters firmly together and invert cake, plum side up. Cool cake completely. Cut into wedges. Serve with a scoop of vanilla ice cream (or healthy - some fro-yo! ugh I hate that word) or slightly sweetened whipped cream... or do like my mom and put cool whip on it, because yeah - thats healthy.. mmmm chemicals.


*The original recipe called for 1 1/4lbs plums, about 8 medium sized one. I had about 1lb, which was 5 plums... and I bet I only used 3-4 of them. So, use your judgement.. I'm sure you'll be able to eat the leftovers with no problem.

**The almonds... oh the almonds... these suckers are LOUD in the food processor. Just be warned. One option you can do is just pick up a bag of almond flour from Trader Joe's. I had almonds handy so I didn't bother making the trip to the store.

Ok - so there ya have it. My buckle is still cooling on the countertop, so once I get before/after photos up I'll post them as well as how delicious it is... it smells wonderful, so I can only hope it tastes equally as good.

Enjoy!
Lauren


7.26.2010

Blueberry Cornmeal Upside-Down Cake


This recipe came about when looking at a cherry upside down cake but wanting to use this bunch of local blueberries we'd just picked up from the Franklin Farmer's Market... and really, I bet any berry could work here as well as Cherries... but maybe next time I make it, I'd cut back some on on the bluberries. Although - thinking back, the amount of blueberries tasted right, just doesn't look as pretty when so overloaded with them. Oh well - not gonna complain. This recipe was delicious and would probably have been even better with a scoop of buttermilk ice cream or some sweetened mascarpone on top. (yes, I have a sick love affair with buttermilk.)
This also is a great cake because its not overly sweet - yes its dessert, so its sweet... but the cornmeal adds a nice contrast in adding almost a savory aspect to it.. as well as the balsamic vinegar! yum! I bet if I had the time and patience, I could live off recipes involving buttermilk and balsamic vinegar.

Blueberry Cornmeal Upside-Down Cake
serves 8-12, depending on how generous you are
adapted from Bon Appetit

Ingredients:
  • 3/4c (1 1/2 sticks) unsalted butter, room temperature, divided.
  • 1/4c (packed) dark brown sugar
  • 2 teaspoons balsamic vinegar
  • 3c bluberries (though you could probably get away with 2)
  • 1 1/4 cups all purpose flour
  • 1/4 cup yellow cornmeal (preferably stone-ground medium grind)
  • 2 teaspoons baking powder
  • 1/4 teaspoon salt
  • 1 cup sugar
  • 2 large eggs, separated
  • 3/4 teaspoon vanilla extract (I bet almond extract would be nice, too)
  • 1/2 cup whole milk
  • 1/4 teaspoon cream of tartar
Directions:
  1. Preheat oven to 350 degrees.
  2. Combine 1/4c butter with brown sugar and balsamic vinegar in a 10" or 11" ovenproof skillet with 2" sides, preferably cast iron. Heat over medium heat until butter melts and sugar dissolves, stirring often. Increase heat to high, add blueberries and bring to a boil. Remove from heat.
  3. In a medium bowl, whisk flour, cornmeal, baking powder, & salt. Using electric mixer, beat 1/2c butter with sugar until pale and fluffy, about 3 minutes. Beat in egg yolks and vanilla. Add flour mixture alternately with milk, beginning and ending with the flour and making sure to scrape down the sides of the bowl.
  4. Using dry beaters in a separate clean bowl, beat egg whites until foamy. Add cream of tartar and beat until egg whites are stiff but not dry. (I say, if you can hold the bowl upside down over your head and the egg whites don't fall out, you're there... although I'd hate to see what happens if they're not ready!) Using rubber spatula, fold 1/4 egg whites into batter to lighten up. Then add remainder of egg whites in 3 additions, gently folding so not to lose the volume. Batter will be thick!
  5. Spread batter over blueberries in the skillet and use an offset spatula to evenly spread over all bluberries and cover completely.
  6. Place cake in center of the oven and bake until top is golden brown and cake tester comes out clean... I'd say start checking after 35 minutes... though could take up to 45 minutes. The smaller the skillet, the longer this cake will take to bake.
  7. Cool in skillet for 5 minutes. Run spatula around the edges of the skillet to loosen cake from sides. Place large serving platter on top of the skillet and then very carefully, as well as swiftly, with potholders in hands, plate firmly held to skillet... invert the skillet over! Leave skillet atop platter for an additional 5 minutes to let the topping start to gain its new position. Remove skillet......... and.... hopefully........ you will have a beautiful upside-down cake! Now its very possible a few rogue blueberries decided they wanted to remain in the skillet, so a little positioning of these blueberries may be in order. Thats ok, no one is going to notice. Let cake cool at least 45 minutes and then cut into wedges to serve. Can be served warm, or at room temperature... but I bet you this cake tastes delicious cold, too!
Enjoy!

Lauren

6.04.2009

(Almost) Flourless Chocolate Cake with Port & Balsamic Glazed Cherries

I have been DYING to make this recipe for a long time ever since I saw the pictures the blog, designspongeonline.com (which I will post here and cannot, by any means, take credit for). I mean, look at them. If you're mouth isn't salivating then you must be crazy.

Well, my good friend and dance buddy, Lauren, from Cal Poly came in town last Saturday to visit. She traveled all the way from the warm farm town of Yuba City to enter the June Gloom of San Francisco. Besides her inappropriate summer clothes, she brought with her a HUGE basket of bing cherries - picked from a tree in her very own back yard! My am I jealous! Then again, I'd have to live in Yuba City... Since we were hanging out for the day we decided it'd be fun to bake something with them. We both decided that chocolate would have to be the vessel (naturally). Finally, I found my excuse to make this lovely and delicious cake.

This cake is nuts. It is beyond good. I'm not sure about the readers here but sometimes I swoon when I eat certain foods (truffles, chocolate, balsamic vinegar, to name a few). I was swooning. This is super dense but still moist. I've made flourless chocolate cake before that was very dry and disappointing. This was not! The addition of cinnamon and espresso powder to this dish is what really makes it stand out. The bonus? Well, you have to use port for the reduction sauce which means you'll have leftovers to drink with your cake!


The Cake:

  • 12 - 14 oz chocolate ( I prefer 56% or higher cacao)
  • 2 Tblsp Cocoa powder (dark, dutch process is best!)
  • 1 1/4 tsp Cinnamon
  • 1 1/4 tsp espresso powder
  • 5 Tblsp Flour
  • 5 eggs
  • 1 1/4 cups sugar
  • 2 sticks unsalted butter (1 cup)

Cherries:

  • 1 pound cherries, stemmed, pitted (I recommend buying a pitter for this, Lauren saved me!)
  • 3/4 cup ruby Port ( I used Justin 'Obtuse' Port)
  • 1/2 cup sugar
  • 2 tablespoons balsamic vinegar

Directions:

1. Butter and Flour a 10" springform pan (or you can use a fluted torte pan so long as it has a removable bottom)

2. Set oven to 375ยบ

3. Mix all dry ingredients together in a medium bowl. Set aside

4. Melt and stir butter and chocolate together over double boiler until everything is melted and smooth.

5. Beat eggs and sugar in mixer until starting to thicken.

6. Add remaining dry ingredients to mixer, and fold in slowly.

7. Slowly fold in melted chocolate to dry mixture so eggs do not curdle. You can temper it by adding a little of the warm chocolate mixture to the egg mixture first to raise the temperature.

8. Pour into pan and bake for 25-30 minutes.

9. While cake is baking, prepare cherry mixture

10. Stir cherries, port, sugar, and vinegar in heavy large skillet over high heat until sugar dissolves.

11. Bring to boil; reduce heat to medium and simmer until cherries are soft and wooden spoon leaves path in sauce when drawn across bottom of skillet, about 20 minutes. Remove from heat.

12. Pull cake out of oven to cool.

13. Serve cake with cherry compote.


Buon Appetito!
- Lindsay


5.14.2009

Strawberry Pie


I'd never had Strawberry Pie before and Brandon kept bugging me to make one for him.. So I waited until the Tennessee Strawberries were in season.. went down to the farmer's market and picked up a quart of the lovely red berries and made him that pie! (I think I nailed it).
So yeah - strawberry pies... turns out its a COLD pie. Something I'm not used to eating... apparently Shoney's makes one that he remembered from childhood - but I suggest DO NOT go to Shoney's to eat pie - or anything for that matter. It only takes a few ingredients and some patience and you have yourself a sweet strawberry pie.

Strawberry Pie
serves 8 - or 2

Ingredients:
  • 1 (9 inch) pie crust, baked
  • 1 quart fresh strawberries
  • 1 cup white sugar
  • 3 tablespoons cornstarch
  • 3/4 cup water
  • 1/2 cup heavy whipping cream
Directions:
  1. Arrange half of strawberries in baked pastry shell. Mash remaining berries and combine with sugar in a medium saucepan. Place saucepan over medium heat and bring to a boil, stirring frequently.
  2. In a small bowl, whisk together cornstarch and water. Gradually stir cornstarch mixture into boiling strawberry mixture. Reduce heat and simmer mixture until thickened, about 10 minutes, stirring constantly. Pour mixture over berries in pastry shell. Chill for several hours before serving. In a small bowl, whip cream until soft peaks form. Serve each slice of pie with a dollop of whipped cream.
Its really good I promise!

Posted by Lauren

5.05.2009

Tres Leches Cake... well, really quatro

So I do realize that I'm WAYYY behind on posting recipes. I apologize. I truly do. But at least I'm not as behind as the person who's NEVER POSTED ANYTHING. Yeah, you know who you are.

Sorry for the obligatory pestering of a CERTAIN SISTER...

Anyway, back to food. I made this cake for a company pot luck for Cinco De Mayo. It is so so tasty. Each time I make it I like to vary what I add in regards to milk and to liquor (definitely had a heavy hand this time) but no matter what - it's moist, just sweet enough, spongy, and most importantly delectable. I always get rave reviews. See, I made it for Cinco De Mayo 2008 and this year I actually wanted to do something different. However, when my coworkers found out I wasn't going to make it they protested. Alas, I gave in. But it did not disappoint. It's now my go-to Cinco De Mayo dessert.

Ingredients

The Cake:

  • 8 large eggs, separated
  • 2 2/3 cups granulated sugar
  • 2 2/3 cups all-purpose flour
  • 2 1/4 teaspoons baking powder
  • 2/3 cup whole milk
  • 1 teaspoon vanilla extract

The Four Milks:

  • 1 14-ounce can evaporated milk
  • 1 12-ounce can sweetened condensed milk
  • 1 cup heavy cream
  • 1 can coconut milk
  • 1/8 cup dark rum or other liquer (roughly - I've also done variations with Disaronno & Frangelico)

The Topping (optional):

  • Whipping Cream
  • sugar
  • sliced strawberries
  • sliced mangoes

Directions

To make the cake: Preheat the oven to 350 degrees F. Lightly grease and flour a 11 by 15-inch baking dish and set aside.

In the bowl of a mixer, beat the egg whites on low speed until soft peaks form. Add the sugar gradually with the mixer running and peak to stiff peaks. Add the egg yolks 1 at a time, beating well after the addition of each.

Sift together the flour and baking powder and add to the egg mixture, alternating with the milk. When you do this, you'll split the flour mixture into thirds, adding the milk (divided in half) in between adding the thirds of flour. The goal is to start and end with the flour mixture. Also, do this quickly so the batter does not lose volume. Stir in the vanilla. Then, pour into the greased pan. Bake until golden, 30-35 minutes.

To make the cream topping: In a blender, or using a large bowl and a whisk, combine the evaporated milk, condensed milk, heavy cream, and liquor and blend on high speed.

Remove the cake from the oven and while still warm poke some holes in the cake and then pour the cream mixture over it. Let sit and cool to room temperature. Cover and refrigerate until well chilled, at least 4 hours or overnight.

Once cake is chilled and ready to serve, make the topping. Pour heavy whipping cream into a bowl and beat until it starts to thicken. Add sugar to taste. Continue beating until thick (but not too thick!). Spread over cake. Slice strawberries and mangoes and arrange over cake.

Buon Appetito!
-Lindsay


4.20.2009

Strawberry Mascarpone Tart with Balsamic Glaze


I finally had an excuse to make this! The cover of April's issue of Gourmet Magzine was this tart and I desperately wanted a reason to make it. It had a light pastry crust, a no-bake mascarpone filling, and topped off with macerated strawberries with a port glaze. Yes - the recipe calls for port. Unfortunately - Kyle lives in a "dry county" and due to the high alcohol content and addition of brandy to port wine, it was sold only in liquor stores. After searching downtown Dallas en route to Kyle's friends house, we only found 1 liquor store and port was not sold there (but they had plenty of 1.75L bottles of Gallo pink wine!). So after getting closer to her friends' house, we realized we had entered BACK into a dry county. Alright - time for a solution. What's the next best thing? Balsamic vinegar. Alright - now to find a grocery store!! Once again, found ourselves driving up and down streets in a mostly mexican neighborhood or something - because we passed plenty of supermercado's and discount food plus or whatever thats supposed to be - but I didn't think we'd find balsamic vinegar in a mexican grocery store. My dad was convinced, though. So we came upon a super super mercado - El Rio Grande! I bet they were the only 2 white people in there - and just like I thought... no balsamic. About ready to give up (well, I wasn't - I was counting on my dessert to be nothing short of amazing, and the absence of this ingredient would probably have ruined my whole weekend) we finally found a white super market. Yay! Balsamic vinegar was purchased and we were on our way!
Alright, enough cheese. But seriously - if you ever want to impress guests, make this dessert. It is really good!

Strawberry Mascarpone Tart with Balsamic Glaze
serves 8 (and seriously - no more!)

For tart shell:
  • 1 1/4 cups all-purpose flour
  • 3 tablespoons granulated sugar
  • Rounded 1/4 tsp salt
  • 7 tablespoons unsalted butter, cut into 1/2-inch pieces
  • 1 large egg yolk
  • 1/2 teaspoon pure vanilla extract
  • 1/2 teaspoon fresh lemon juice
  • 3 tablespoons cold water
For filling:
  • 1 1/2 lb strawberries (about 1 1/2 qt), trimmed and halved lengthwise
  • 1/3 cup granulated sugar
  • 3/4 cup ruby Port - or in my case, substitute with Balsamic Vinegar
  • 1 lb mascarpone (about 2 cups)
  • 1/4 cup confectioners sugar
  • 1 teaspoon fresh lemon juice
  • 1/2 teaspoon grated lemon zest
  • 3/4 teaspoon pure vanilla extract
  • 1T chopped fresh mint leaves (don't substitute with dry, just leave out completely unless you have fresh mint)
Equipment - a 10-inch fluted tart pan with removable bottom; pie weights or dried beans

Directions:

Make tart shell:

  • Blend together flour, sugar, salt, and butter in a bowl with your fingertips or a pastry blender (or pulse in a food processor) just until mixture resembles coarse meal with some roughly pea-size butter lumps. Beat together yolk, vanilla, lemon juice, and water with a fork, then drizzle over flour mixture and stir with fork (or pulse) until mixture comes together.
  • Gently knead with floured hands on a lightly floured surface until a dough forms, then gently knead 4 or 5 times. Press into a 5-inch disk. Place in center of tart pan and cover with plastic wrap. Using your fingers and bottom of a flat-bottomed measuring cup, spread and push dough to evenly cover bottom and side of pan. Prick bottom of tart shell all over with a fork and freeze until firm, about 10 minutes.
  • Preheat oven to 375°F with rack in middle.
  • Line tart shell with foil and fill with pie weights. Bake until side is set and edge is pale golden, about 20 minutes. Carefully remove foil and weights and continue to bake until shell is deep golden all over, about 20 minutes more. Cool in pan, about 45 minutes.

Make Filling While Tart Shell Cools:

  • Stir together strawberries and granulated sugar in a bowl and let stand, stirring occasionally, 30 minutes. Strain in a sieve set over a small saucepan, reserving berries. Add Port (or balsamic) to liquid in saucepan and boil until reduced to about 1/4 cup, 10 to 15 minutes. Transfer to a small bowl to cool slightly.
  • Meanwhile, whisk together mascarpone, confectioners sugar, lemon juice, zest, vanilla, and a pinch of salt until stiff.

Assemble Tart:

  • Spread mascarpone mixture evenly in cooled tart shell, then top with strawberries. Drizzle Port glaze all over tart. I would suggest waiting until near time to serve before topping the tart, otherwise the glaze may start to spread and the tart will be slightly less attractive. I also added some fresh chopped mint to the strawberries for color.


Hope you enjoy as much as we did!

Submitted by Lauren

3.18.2009

buttermilk cheesecake... it doesn't get much better than this.


Welll... it started out as Brandon asking his dad to make his famous ragout... and then his homemade challah.. and then the whole family coming together for this big delicious dish. Well, me being the baker... I hate showing up to meals empty handed. I figured if his dad was going to show off his cooking talents, I wanted to show off my baking talents. (Though it was risky, considering I also decided to do this by making something I'd never made, or tasted, before.) But it was a risk I was willing to take. Like Lindsay said, a way to a man's heart is through his stomach... I feel like a way into anyone's heart is through their stomach.. so I wanted to try and win some people over with this one. I think it worked.

So I knew they liked cheesecake.. but I didn't want to do a boring plain cheesecake, but I also didn't want to get too crazy and make something people wouldn't like. I looked into mascarpone cheesecakes, ricotta cheesecakes, plain cheesecakes... and then it hit me - buttermilk! Brandon loves buttermilk! Why not see if it can be incorporated into a cheesecake! Sure enough, I found a few recipes online... granted, half of them were using the metric system (so I couldn't use those), and the others had no reviews... so I really didn't know what I was getting myself into. I figured I'd go for the one with the least amount of ingredients. I mean - simple is always better in the long run. To top it off, this particular recipe used cornmeal in the crust! What a great idea! Plus I felt the dessert tied into the Italian theme of the meal. (Oh yeah, I forgot to mention I topped the dessert with aged balsamic vinegar and macerated strawberries!)

So a few tips you need to know about cheesecakes before jumping into the recipe.
  • once you start adding eggs to the batter, beat just to combine and no longer! beating the eggs to much will whip too much air into the batter, causing issues with the texture. If you want it to be creamy, then add eggs in one at a time, making sure the egg is incorporated before adding the next.. and then stop beating once they're combined!
  • water baths help to aid in a consistant heat source in the oven. They aren't necessary in my opinion, though.. I say this because I don't use them and my cheesecakes have turned out fine... But in order to acheive the perfect results without the use of a water bath, you must focus on the oven temperature.
  • Quickly dropping the temperature will cause cracking! You need to slowly bake the cheesecake in a lower temperature oven... and just as you slowly cook it, you need to slowly cool it. This will help prevent cracking and help aid in a creamier cheesecake!
Ok so now that you know my few pointers on cheesecakes - on to the recipe!

Buttermilk Cheesecake with Balsamic Strawberries
serves 12

Ingredients:

  • 1c butter, room temperature (or 2 sticks)
  • 1 1/2c graham cracker crumbs (you can buy these as crumbs in the baking aisle - i highly recommend doing this to save the time using the food processor, unless you like graham crackers and want to have the extras around!)
  • 1/2c yellow cornmeal
  • 1c + 2T granulated sugar
  • 3 80z packages of cream cheese, room temp. (I used regular, but i'm sure you could use lowfat. just might affect the texture some.)
  • grated zest of 2 lemons (recipe calls for 2, I only used 1 so not to overpower the flavor... and I used a meyer lemon - I much prefer their floral flavor!)
  • 3/4c buttermilk (don't worry if it says lowfat - all buttermilk is lowfat- this is perfectly fine)
  • 1t pure vanilla extract
  • 4 eggs
Directions:
  1. Heat oven to 350 degrees F.
  2. Set aside 1 stick of butter for cheesecake batter. Take other stick, use 2 tablespoons to butter a 9" or 10" springform pan (if you use a 9", batter will be thicker and you will need to bake the cheesecake longer). Melt the remaining 6 tablespoons.
  3. Combine graham cracker crumbs, cornmeal, and 2 tablespoons of sugar in a medium bowl. Add the melted butter and mix thoroughly with a fork. Dump into prepared pan and press evenly along bottom and 1" up the sides. Its ok if its not perfect, Lindsay. Bake about 10 minutes, or until lightly browned. It'll smell nice and fragrant and let you know its ready.
  4. Cream remaining butter, remaining sugar, and cream cheese with lemon zest in large bowl of an electric mixer until smooth. Its important for ingredients to be ROOM TEMPERATURE so lumps do not form! Make sure to scrape bottom of the bowl a few times while beating.. cream cheese likes to lurk near the bottom and then show itself when you're pouring the batter! Ok jokes aside... Once you've combined these ingredients and its nice and creamy, add the buttermilk and vanilla extract. Beat, occasionally scraping down the sides and bottom, until it is mixed well. Add eggs, one at a time, and beat slowly until just combined. DO NOT OVERBEAT!!
  5. Pour batter into reserved crust and bake 25-30 minutes (maybe a little longer if using a smaller pan). Reduce heat to 300 degrees F and bake an additional 25-30 minutes (again, I think I left it in for 40 minutes at this temperature). Reduce heat again to 200 degrees F and bake until done. About 20 minutes. (and again, I think I baked it for at least 30 minutes at this temp.) You want the sides to be set and the very center to be SLIGHTLY jiggly. If its really jiggly, keep baking! Now - for the important part. Turn off the oven and leave the cheesecake in the oven! For at least 3 hours! Let it cool completely in the oven... this slow cooling process really helps I swear! Wow I really overuse the exclamation point.
  6. Remove the cheesecake. Let cool completely at room temperature (it will still be slightly warm coming out of the oven). Cover, and then place in the fridge overnight to set.
  7. When removing the sides of the pan, you may want to run a knife around the edge if you're worried at all about the cheesecake sticking. And a tip for slicing cheesecake... have a glass of boiling hot water and soak a sharp knife in it. Dry the hot knife on a tea towel and slice. Do this between each slice and you'll have perfectly sliced cheesecake!
Macerated Balsamic Strawberries:
serves 8

Ingredients:
  • 1 1/2lbs strawberries
  • 1/4c sugar (i used combination of raw and granualted)
  • 1T aged balsamic vinegar
  • 1T freshly squeezed lemon juice
Directions:
  1. Wash and slice strawberries... however you want to slice them.
  2. Place strawberries in a large bowl, sprinkle sugar on top and stir to combine. Stir in the lemon juice (I used about half a lemon and squeezed it over the strawberries). Next drizzle the balsamic over the strawberries and stir. Let sit at room temperature for 1-2 hours.
  3. Once the juices have started to come out, you can place it in the fridge or leave them out a few more hours. I would suggest doing this the day you serve the cheesecake and no sooner! Once these have sat around for about a day, the strawberries start to get mushy.

So make the cheesecake the day before, make the strawberries a couple hours before... spoon them over the slices and voila! You have cheesecake! I also drizzled a little aged balsamic over the slices of cheesecake when I served it..

Ok - that was a long post. I hope it was worth it for someone because its really really good!

Enjoy!
Lauren

3.17.2009

S'mores indoors!


From The Sandlot:

Ham Porter
: Hey, Smalls, you wanna s'more?
Smalls: Some more of what?
Ham Porter: No, do you wanna s'more?
Smalls: I haven't had anything yet, so how can I have some more of nothing?
Ham Porter: You're killing me Smalls! These are s'more's stuff! Alright, now pay attention. First you take the graham, you stick the chocolate on the graham. Then you roast the 'mallow. When the 'mallows flaming... you stick it on the chocolate. Then cover with the other end. Then you scarf. Kind of messy, but good!

Simply put, s'mores are amazing. I probably love them so much because I have so many childhood memories with them. My dad used to take me and my two other sisters on these father-daughter camping trips when we were younger and I know for a fact that s'mores were half the reason I actually went. I would get so excited about making s'mores. As I got older and my perfectionism (OCDism) developed further, getting the perfect brown marshmallow became a game to me.

Now, living in a city I often miss the great outdoors. Obviously there are a ton of options close to San Francisco that I could travel to for camping, but that's a whole other issue I don't want to get into right now. So how nice would it be to bring the warm-fuzzy feeling of roasting some marshmallows with friends to your very own living room? Well, that's how indoor s'mores came about.

What's different about this recipe is that instead of using graham crackers as a base I used matzo. If any of you are unfamiliar with matzo it's a cracker like flatbread made of flour and water. However, the dough is pricked in several places and not allowed to rise before or during the baking process which creates the flat bread.

My roommate Jenny is my live-in Martha Stewart protogรฉ and she sent me a link to this Marta Stewart recipe that used matzo as a base. In this recipe she drizzle the matzo with chocolate to give it the sweetness. What make it extra special is by using the lightly salted matzo there's a nice combination of salty and sweet that you don't normally get with the typical graham cracker.

Now how did we roast these mallows you ask? Well, being scared of what kind of toxic fumes might be in the DuraFlame logs we opted for the sterno can. A sterno can is what is often used in the food service industry to heat buffet platters. It's a little can that is filled with a flammable jell. You light it with a lighter and it stays lit for a long time. It's small, portable, and clean. Much easier than logs! Martha Stewart suggests putting them under the broiler. Alternatively, you could also use your gas stove if you have one.

Ingredients

For the ganache:
  • 2 oz dark chocolate
  • 1T butter
  • 1T milk or cream

For the s'mores
  • Chocolate bar of your choice (Hershey's is classic but you can go gourmet if you like)
  • Marshmallows
  • Streit's lightly salted matzo
  • Sterno can
To make the ganache heat chocolate and butter over a double boiler stirring often. Be careful that the bowl doesn't touch the water. When melted, add a touch of milk or cream until it's at a consistency that drizzles well. I added roughly 1-2T.

Lay out matzo pices on a piece of wax paper and break up into desired size. Drizzle chocolate over the matzo pieces. Let rest for roughly 30 minutes at room temp or put in the refrigerator for 5 minutes if you need to speed the process.

Now you're ready to assemble your s'mores. If you don't know how to make a s'more that's very unfortunate. I suggest you follow Ham Porter's advice above. That or just follow Zach's method below.


Boun Appetito!
- Lindsay

3.16.2009

Blood Orange Olive Oil Cake

courtesy of the New York Times

The New York Times is one of my favorite places to find new recipes. I enjoy them because they usually are accompanied by some sort of story of
how the recipe evolved whether it be a dietary restriction, as in the case of this recipe, a seasonal ingredient, a family heirloom, or just the health benefits of a certain ingredient. Not only that, and most importantly, most of the recipes I have found here actually appeal to me more often than not. Furthermore, they don't disappoint.

I was intrigued by this recipe because it uses olive oil as the fat base. I can't remember a time when I've ever used olive oil in a sweet recipe so I decided why not now? I also just love using blood oranges, more for their look than taste. Something
about the red flesh contrasting against the orange skin and white pith is very aesthetically pleasing. I took some pictures of my own but haven't had time to upload them. So here's a fancy one from Andrew Scrivani for The New York Times.

The result was a very moist cake. Three days later the cake is tastes as it did the firs
t day - moist, rich, and full of citrus.

Ingredients

  • Butter for greasing pan
  • 3 blood oranges
  • 1 cup sugar
  • Buttermilk or plain yogurt ( I used yogurt, roughly 1/3rd cup)
  • 3 large eggs
  • 1 3/4 cups all-purpose flour
  • 1 1/2 teaspoons baking powder
  • 1/4 teaspoon baking soda
  • 1/4 teaspoon salt
  • 2/3 cup extra virgin olive oil
  • dash of nutmeg
  • Sugar glaze, optional (see note)
  • Honey-blood orange compote, for serving, optional (see note)
  • Whipped cream, for serving, optional.

1. Preheat oven to 350 degrees. Grease a 9-by-5-inch loaf pan. Grate zest from 2 oranges and place in a bowl with sugar. Using your fingers, rub ingredients together until orange zest is evenly distributed in sugar.

2. Supreme an orange: Cut off bottom and top so fruit is exposed and orange can stand upright on a cutting board. Cut away peel and pith, following curve of fruit with your knife. Cut orange segments out of their connective membranes and let them fall into a bowl. Repeat with another orange. Break up segments with your fingers to about 1/4-inch pieces.

3. Halve remaining orange and squeeze juice into a measuring cup. You will have about 1/3 cup or so. Add buttermilk or yogurt to juice until you have 2/3 cup liquid altogether. If using yogurt, as I did, make sure to whisk the yogurt into the liquid so you have an accurate reading. Pour mixture into bowl with sugar and whisk well. Whisk in eggs.

4. In another bowl, whisk together flour, baking powder, baking soda and salt. Add a dash of nutmeg and season to your preference. Gently whisk dry ingredients into wet ones. Switch to a spatula and fold in oil a little at a time. Fold in pieces of orange segments. Scrape batter into pan and smooth top.

5. Bake cake for about 50 minutes, or until it is golden and a knife inserted into center comes out clean. Cool on a rack for 5 minutes, then unmold and cool to room temperature right-side up.

Here the NYT suggested serving with whipped cream and honey-blood orange compote. I, however, made a glaze instead of 10x sugar combined with a touch of almond extract. I then added water until I got it to a slightly runny consistency. Poke some holes in the cake after it comes out of the oven and then drizzle the sugar mix on. After a few minutes it should harden forming a sugary shell on top.

Yield: 8 to 10 servings.

Note: To make a honey-blood orange compote, supreme 3 more blood oranges according to directions in Step 2. Drizzle in 1 to 2 teaspoons honey. Let sit for 5 minutes, then stir gently.

Boun Appetito!
-Lindsay

3.10.2009

Rhubarb Pie... who woulda thunk it?


Yeah.. so coming from parents who should have passed this down to me... I'm really surprised I didn't know about rhubarb until I started working at a bakery. Even then, I'd never tried it until 3 years later. Apparently my great grandmother used to make rhubarb jam. Mom! Where is this recipe!? Anyway, I discovered this veggie last spring when Brandon mentioned an interest in a rhubarb pie. Of course, when Brandon mentions an interest in something dessert-like, I'm researching how to make it the next day! I'm crazy like that. So I came across a recipe online that had 5 stars from 150 reviews. How could I go wrong?? And let me tell you - I didn't! Yes. I'm vain. Ok - So the big thing is the crust. VERY IMPORTANT not to screw up the crust! Unfortunately I haven't copied down my mom's recipe, so instead I researched a few recipes and kinda came up with my own version (ya know, so i could make it my own). The important thing is to work with very cold ingredients, do not overmix, and do not add too much water!!! So here is my crust recipe.

Pie Crust
makes 3-4 crusts.

Ingredients:
  • 3c flour
  • 1/2t salt
  • 1c shortening
  • 2T butter (for flavor)
  • 6T ice cold water
Directions:
  1. Make sure your shortening and butter are very cold! This is important so that the crust is flakier and its easier to cut into the dry ingredients. Mix the dry ingredients together. Add the shortening & butter and cut into the dry ingredients. You'll want the pieces to be somewhat similar in size to peas.. don't work this too much, you want chunks of fat still intact, this is what helps create the flaky tender crust during the baking process.
  2. Using a fork, start to sprinkle in the water, a few tablespoons at a time, and combine with the fork. Again, do not overmix during this process or the dough will become tough! You want the dough to just start to come together.
  3. Divide the dough up into 3 -4 balls, wrap in plastic, and refrigerate for at least an hour. Again, its important to have the dough cold so the crust will be nice and tender.

Ok. So this is a basic pie dough recipe. Again, it works for me, but you can use any recipe you have around. Really doesn't matter. Just please please pleeaasseeee do not overwork it. I can't tell you how often I see people kneading this dough and it breaks my heart every single time!
So on to the Rhubarb Pie recipe!!


Rhubarb Pie
makes 1 9" pie

Ingredients:
  • 4C Rhubarb (roughly 6-7 stalks)
  • 1 1/3c sugar
  • 6T all purpose flour
  • 1/4t fresh grated nutmeg
  • 1T butter
  • 1 egg white
  • pastry for 9" double crust pie
Directions:
  1. Preheat oven to 450 degrees F (230 degrees C).
  2. Combine sugar and flour and nutmeg. Sprinkle 1/4 of it over pastry in pie plate. Heap rhubarb over this mixture. Sprinkle with remaining sugar and flour. Dot with small pieces of butter. Cover with top crust. Make sure to cut vents into the top crust!!
  3. Combine egg white with about 1T of water. Beat with a fork and then brush over top of crust. Sprinkle granlated or raw sugar over the crust. (this creates a fabulous sweet crunch on the top!)
  4. Place pie on lowest rack in oven. Bake for 15 minutes. Reduce oven temperature to 350 degrees F (175 degrees C), and continue baking for 40 to 45 minutes. You'll start to notice the syrup bubbling up through the vents in the top of the pie crust. Serve warm or cold. Keep in mind that a pie needs to rest for at least 2 hours before you cut into it, though. Otherwise the filling won't properly set up.

So I hope you find time to make this one day. It sounds weird, using a veggie as the star ingredient in a dessert.. And if you taste rhubarb raw, you'll also think its weird. It is very tart! But I promise you, it will remind you more of a tart berry pie like blackberry or raspberry. It has a gorgeous red color as well. Serve it up with a scoop of vanilla ice cream and you'll want to make this treat every spring! You can also swap out some of the rhubarb for strawberries if you desire. A lot of recipes combine the two.. maybe 2 cups of slices strawberries and 2 cups of rhubarb. Just bear in mind that when you cook strawberries, they loose their pretty red color and look almost grey. But they still taste good!

Submitted by lauren.

2.19.2009

Chocolate Soup with Raspberry Hazelnut Salad


So I tried this Michael Chiarello recipe for Chocolate Soup about a year ago when I had a dinner party at my place. It was a big hit that night but for some reason I never made it again. Perhaps it's the richness of the dish or the fact that your literally spooning melted chocolate in your mouth. Not that liquid chocolate is worse than solid chocolate for you, but the indulgence factor is most definitely over the top.

Anyway, Zach has been begging me to make this dish for months now. I told him I'd make it for him before I left for vacation but failed to do that. So I made it up to him this past weekend as a belated Valentine's Day gift. The best part was that I surprised him with it after dinner. He was beyond ecstatic.

Directions

Ganache for the soup:

Ingredients

  • 1 1/2 cups heavy cream
  • 1 tablespoon butter
  • 1 tablespoon sugar
  • 1/2 pound bittersweet chocolate, chopped
  • 1/4 cup raspberry liqueur (recommended: Framboise)

Raspberry Salad:

  • 1/2 pint raspberries
  • 2 tablespoon hazelnuts, roughly chopped
  • 1 tablespoon fresh mint, thinly sliced
  • Small pinch salt
  • 2 tablespoons raspberry liqueur (recommended: Framboise)
  • 4 ounces (1/2 cup) sweetened whipped cream, for garnish
  • Small piece bittersweet chocolate to shave, for garnish

For the ganache:

In a small saucepan bring the cream, butter, and sugar to a boil. Remove from the heat and stir in the chopped chocolate so that it melts completely. Stir in the raspberry liqueur. Let the ganache cool to room temperature and reserve.

For the salad:

Gently combine the raspberries, hazelnuts, mint, small pinch of salt and raspberry liqueur.

In a wide, shallow soup bowl pour about 3 ounces of the room temperature ganache to fill a shallow pool in the bottom of the bowl, about 1/8-inch deep. Place a nice spoonful of the raspberry/hazelnut salad in the center and garnish with a small spoonful of whipped cream and shaved bittersweet chocolate. Top with chopped hazelnuts as well.

And if you're going to go all out and make this decadent dessert, the you may as well do everyone a favor and serve this with a ruby port. The combination is beyond words.

Buon Appetito!
- Lindsay


1.16.2009

Sufganiyot (Donuts!!!)


While I'm on the topic of frying things for Hanukkah (I know, it passed almost a month ago), I thought it would be appropriate to add here the recipe for Sufganiyot. Sufganiyot is another Jewish dish made during Hanukkah and another word for amazing donuts. One thing I learned during Hanukkah this year is that these dishes include lots of frying to symbolize the oil that stayed lit for 8 days. Ok, enough with the religious symbolism - all I know is any excuse to fry something is a good one!

Now, Lauren and Kyle both know that I'm not the neatest person in the kitchen... Ok, maybe that's an understatement... but it's especially true when flour is involved. This was my first time making a dough that called for yeast. A couple months ago when Kyle was visiting I tried my hand at making pasta dough so I thought (or hoped) that making donut dough would be a similar process.

A few things made this very different. The first being I couldn't make this in my food processor. This, of course, meant that my hands would be handling the dough from the get-go. Translation: a mess! The second difference from the pasta dough is that donut dough is MUCH stickier. Translation: a big mess! You should've seen me attempting this. Once I got to the part where I was supposed to knead the dough I realized that I would need a ton more flour than the recipe below called for.

I dig my hands in and start kneading. Instead of the dough actually kneading it just starts clumping to my hands until there's almost no dough actually left on my counter. What is there is more like a smear of dough. I sat there deliberating with myself, hysterically laughing at myself actually, as to how I should react to this situation. The dilemma: both of my hands were completed covered in a sticky mess of dough. Flour was within reach of my hands but it was a bag of flour. If I tried to pick it up, half of my dough would've been lost as it would clearly cling to the bag. Beyond that, I know I have poor luck when it comes to dealing with flour. It tends to go everywhere in my case and I envisioned cups of flour pouring out onto the counter top.

Suddenly, I heard my roommate stir in the bedroom (she had been sleeping). My saving grace... "Jenny?!?!" I said, nervously. I then pleaded for her to come out. She came out curious as to what was going on. As soon as she saw me she realized I was in dire need of a clean pair of hands. So Jenny became my "flour-spooner." She would sprinkle flour on the counter top and my hands and then I would knead. This continued for quite some time until I was able to handle the dough with ease. In the end, it all turned out great but it was quite the learning experience.

Ingredients

Makes 20

  • 2 tablespoons active dry yeast
  • 1/2 cup warm water (100 degrees to 110 degrees)
  • 1/4 cup plus 1 teaspoon sugar
  • 2 1/2 cups all-purpose flour, plus more for dusting
  • 2 large eggs
  • 2 tablespoons unsalted butter, room temperature
  • 1/2 teaspoon freshly grated nutmeg
  • 2 teaspoons salt
  • 3 cups vegetable oil, plus more for bowl
  • 1 cup seedless raspberry jam (I used Mom's homemade multi-berry preserves)
  • Cinnamon and sugar for rolling

Directions

  1. In a small bowl, combine yeast, warm water, and 1 teaspoon sugar. Set aside until foamy, about 10 minutes.
  2. Place flour in a large bowl. Make a well in the center; add eggs, yeast mixture, 1/4 cup sugar, butter, nutmeg, and salt. Using a wooden spoon, stir until a sticky dough forms. On a well-floured work surface, knead until dough is smooth, soft, and bounces back when poked with a finger, about 8 minutes (add more flour if necessary). Place in an oiled bowl; cover with plastic wrap. Set in a warm place to rise until doubled, 1 to 1 1/2 hours.
  3. On a lightly floured work surface, roll dough to 1/4-inch thickness. Using a 2 1/2-inch-round cutter or drinking glass, cut 20 rounds. Cover with plastic wrap; let rise 15 minutes.
  4. In medium saucepan over medium heat, heat oil until a deep-frying thermometer registers 370 degrees. Using a slotted spoon, carefully slip 4 rounds into oil. Fry until golden, about 40 seconds. Turn doughnuts over; fry until golden on other side, another 40 seconds. Using a slotted spoon, transfer to a paper-towel-lined baking sheet. Roll in a mix of cinnamon and sugar while warm. Fry all dough, and roll in sugar.
  5. Fill a pastry bag fitted with a #4 tip with jam. Using a wooden skewer or toothpick, make a hole in the side of each doughnut. Fit the pastry tip into a hole, pipe about 2 teaspoons jam into doughnut. Repeat with remaining doughnuts.
Another option is to make a chocolate filling. The typical recipe calls for jam but since I was making these for Zach I wanted to add chocolate filling as an alternate.

Ingredients

  • 1/2 c chocolate chips or 3 oz bittersweet chocolate, chopped
  • 2 T cream or half and half
  • 1/4 tsp flavoring such as orange or almond (optional)

Directions

  1. Heat the chocolate and cream in a double boiler until melted.
  2. Remove from heat and add any flavorings, if using.
  3. Keep warm until donuts are filled (you don't want it to get cold, otherwise it won't pipe properly into the donuts).
These donuts will go quick and whoever eats them will surely become your new best friend. Buon Appetito!

- Lindsay